Cyberduck
Introduction
Cyberduck is a free, open-source libre server - a small server system that enables you to run your own internet services independently - cloud storage browser for macOS, Windows, and Linux that supports FTP and SFTP, WebDAV, and cloud storage such as Storj and other cloud storage providers.
Users can leverage the Cyberduck services via the user interface (GUI) or CLI (for Linux), including file transfer by drag and drop and notifications via Growl. It is also able to open some files in external text editors.
Users can choose Storj to act as a decentralized cloud storage network target to send files to via the Cyberduck file manager interface, available via Storj's hosted multitenant gateway (Getting started that is backward compatible with S3. This means you’ll be able to integrate with the Storj network via HTTP, and you won’t have to run anything extra on your end.
In this brief tutorial, we'll go over downloading and setting up Cyberduck to integrate with Storj, facilitating easy and intuitive drag-and-drop file transfer to Storj.
Downloading Cyberduck
As a free solution, Cyberduck gives users the freedom to run, copy, distribute, study, change, and improve the software. Those who wish to pay for Cyberduck will receive a registration key as a contributor. Becoming a contributor registers the installed application to your name, disabling donation prompts after downloading or updating.
As noted, Cyberduck supports Windows, macOS as well as Linux. Users can download Cyberduck by navigating to https://cyberduck.io/download/. Here, you can download the given installer for both Windows and macOS.
For those who wish to download via CLI:
Windows
Requires Chocolatey. See other installation options to download the MSI installer for Windows.
macOS
Requires Homebrew. See other installation options to download an OS X installer package.
Linux
RPM Package
Requires Yum Package Manager. See other installation options to download DEB and RPM packages.
DEB Package
Requires APT. See other installation options to download DEB and RPM packages.
Using CyberDuck with Storj - Windows
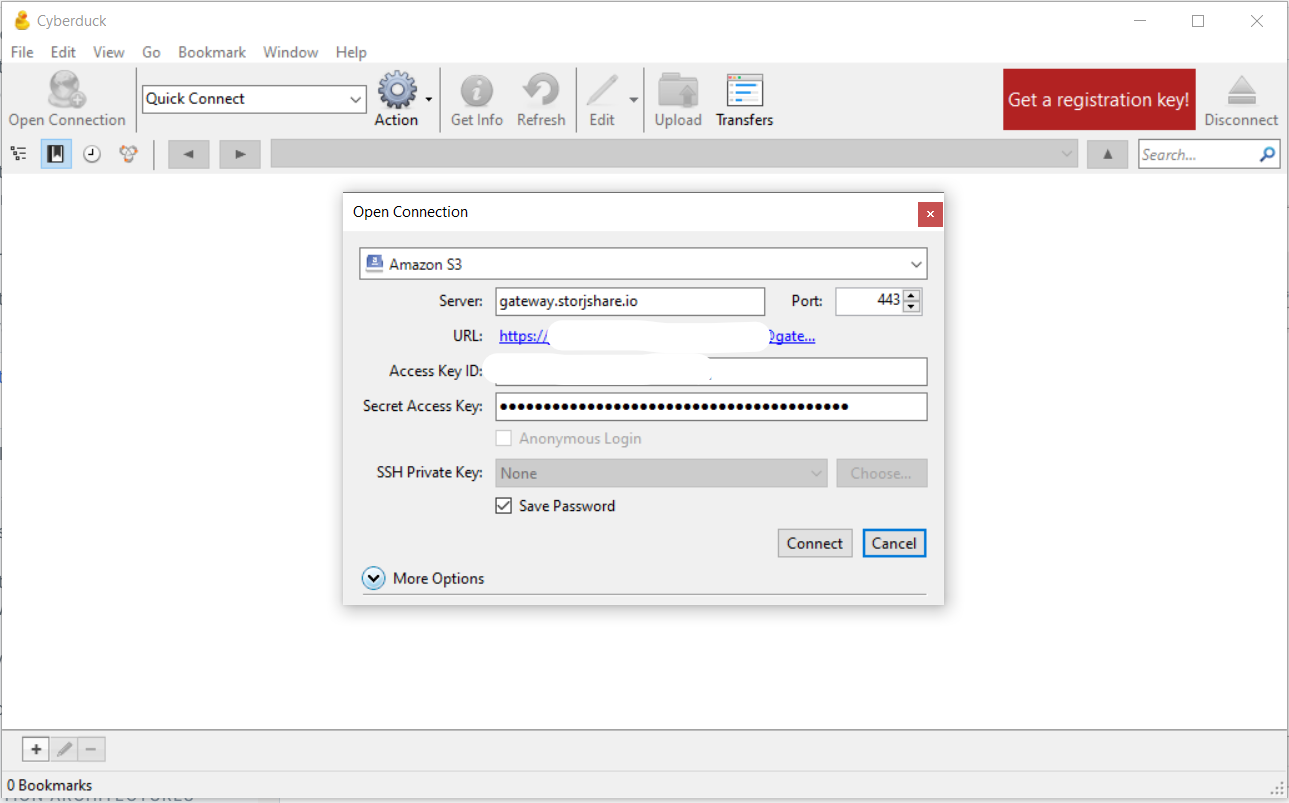
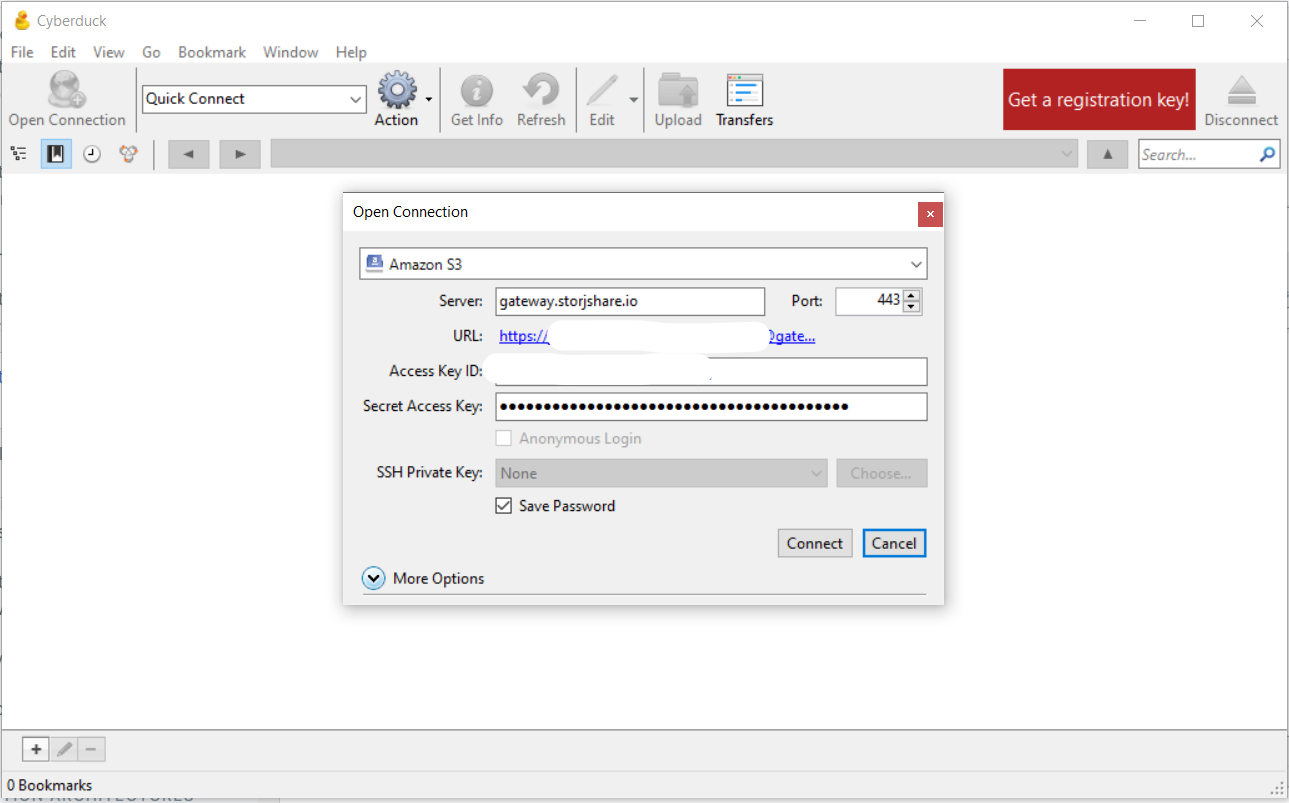
Once the download is complete, you'll be able to open the CyberDuck client. By selecting Open Connection to the top left, you can establish a connection via Cyberduck. By selecting Amazon S3 from the dropdown, you’ll be prompted to fill out the following:
Server:
Port:
Access Key ID:
Secret Access Key:
To configure Storj as the decentralized cloud storage network target, you’ll need to generate Storj credentials.
Using CyberDuck with Storj - macOS
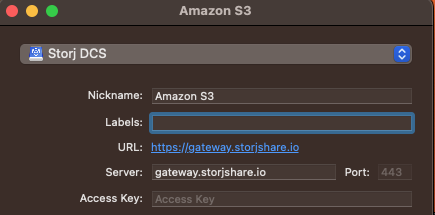
Once the download is complete, you'll be able to open the CyberDuck client. By selecting the + button in the bottom left-hand corner of the client, you'll be able to add a connection bookmark, facilitating the connection between CyberDuck and Storj. Select Storj from the drop-down.
This is where you will add Server, Access Key ID, and the Secret Access Key for Storj Gateway MT.
To configure Storj as the decentralized cloud storage network target, you’ll need to generate Storj credentials.
Generate Credentials to the Gateway MT
One of the most versatile ways to get up and running with Storj is through the Self-hosted S3 Compatible Gateway
Gateway MT offers the following:
Encryption, erasure coding, and upload to nodes occur server-side
Supports parallelism for upload and multi transfer for download
1GB upload will result in 1GB of data being uploaded to storage nodes across the network
Based on S3 standard
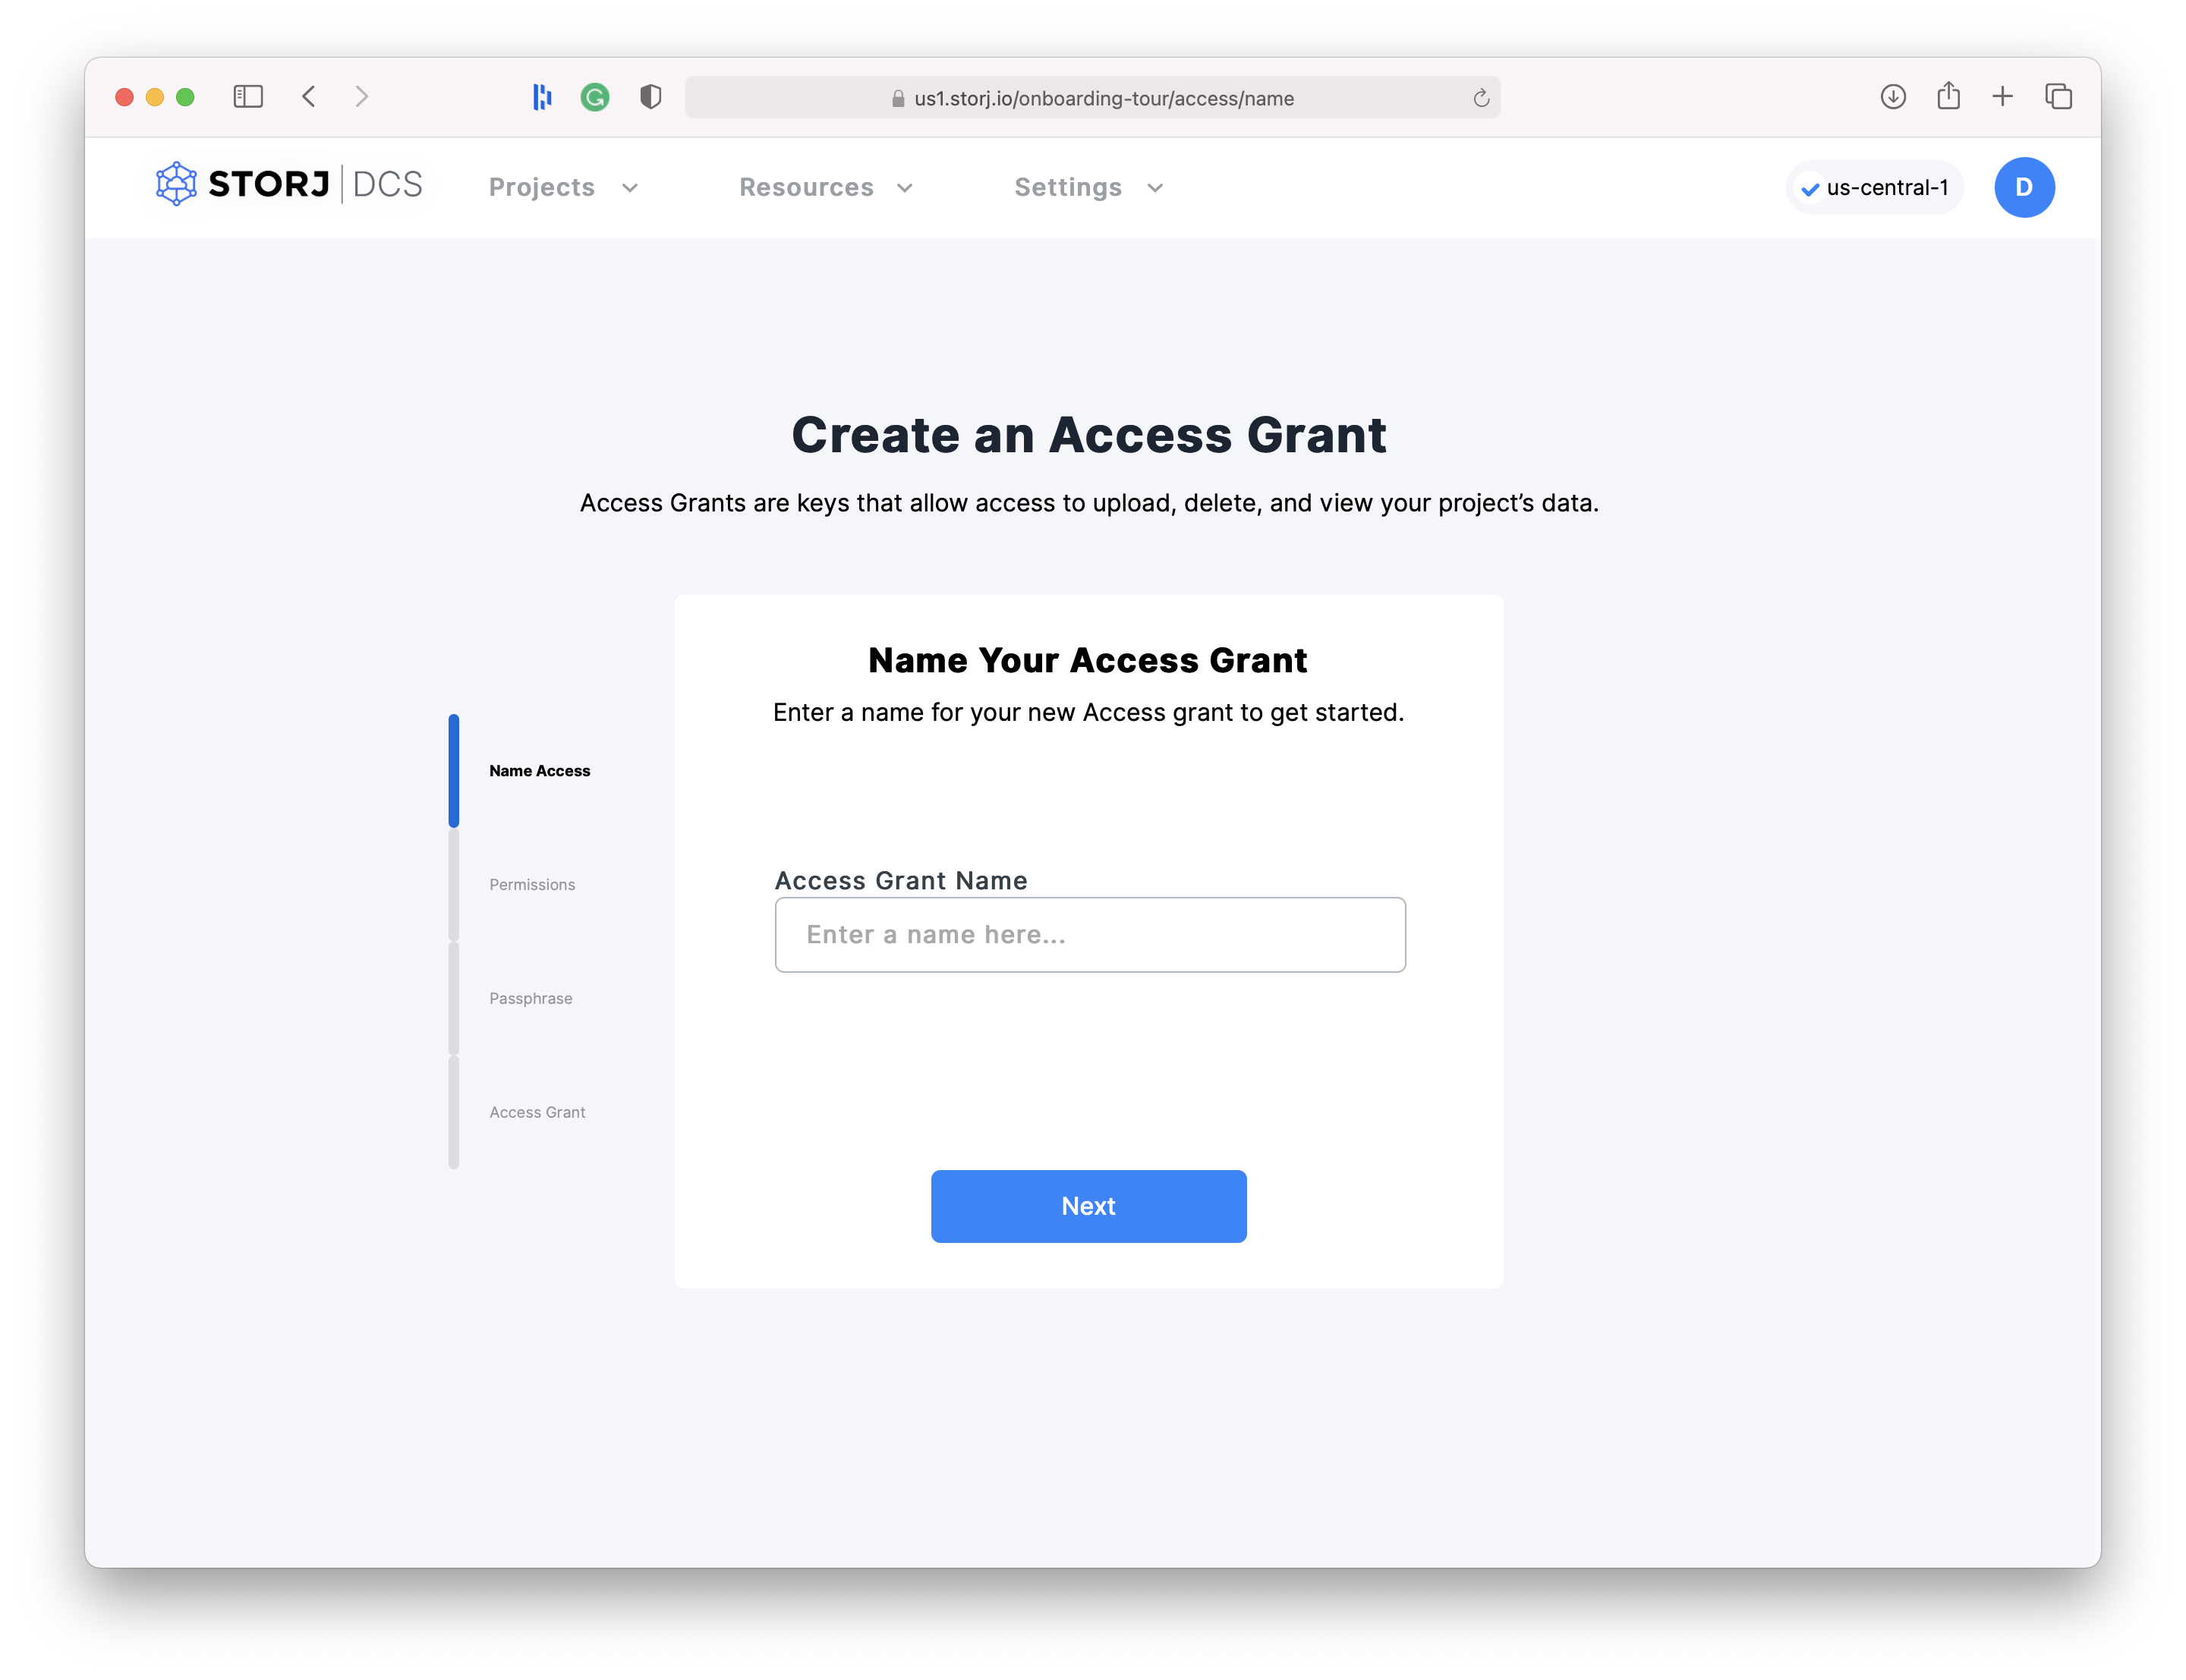
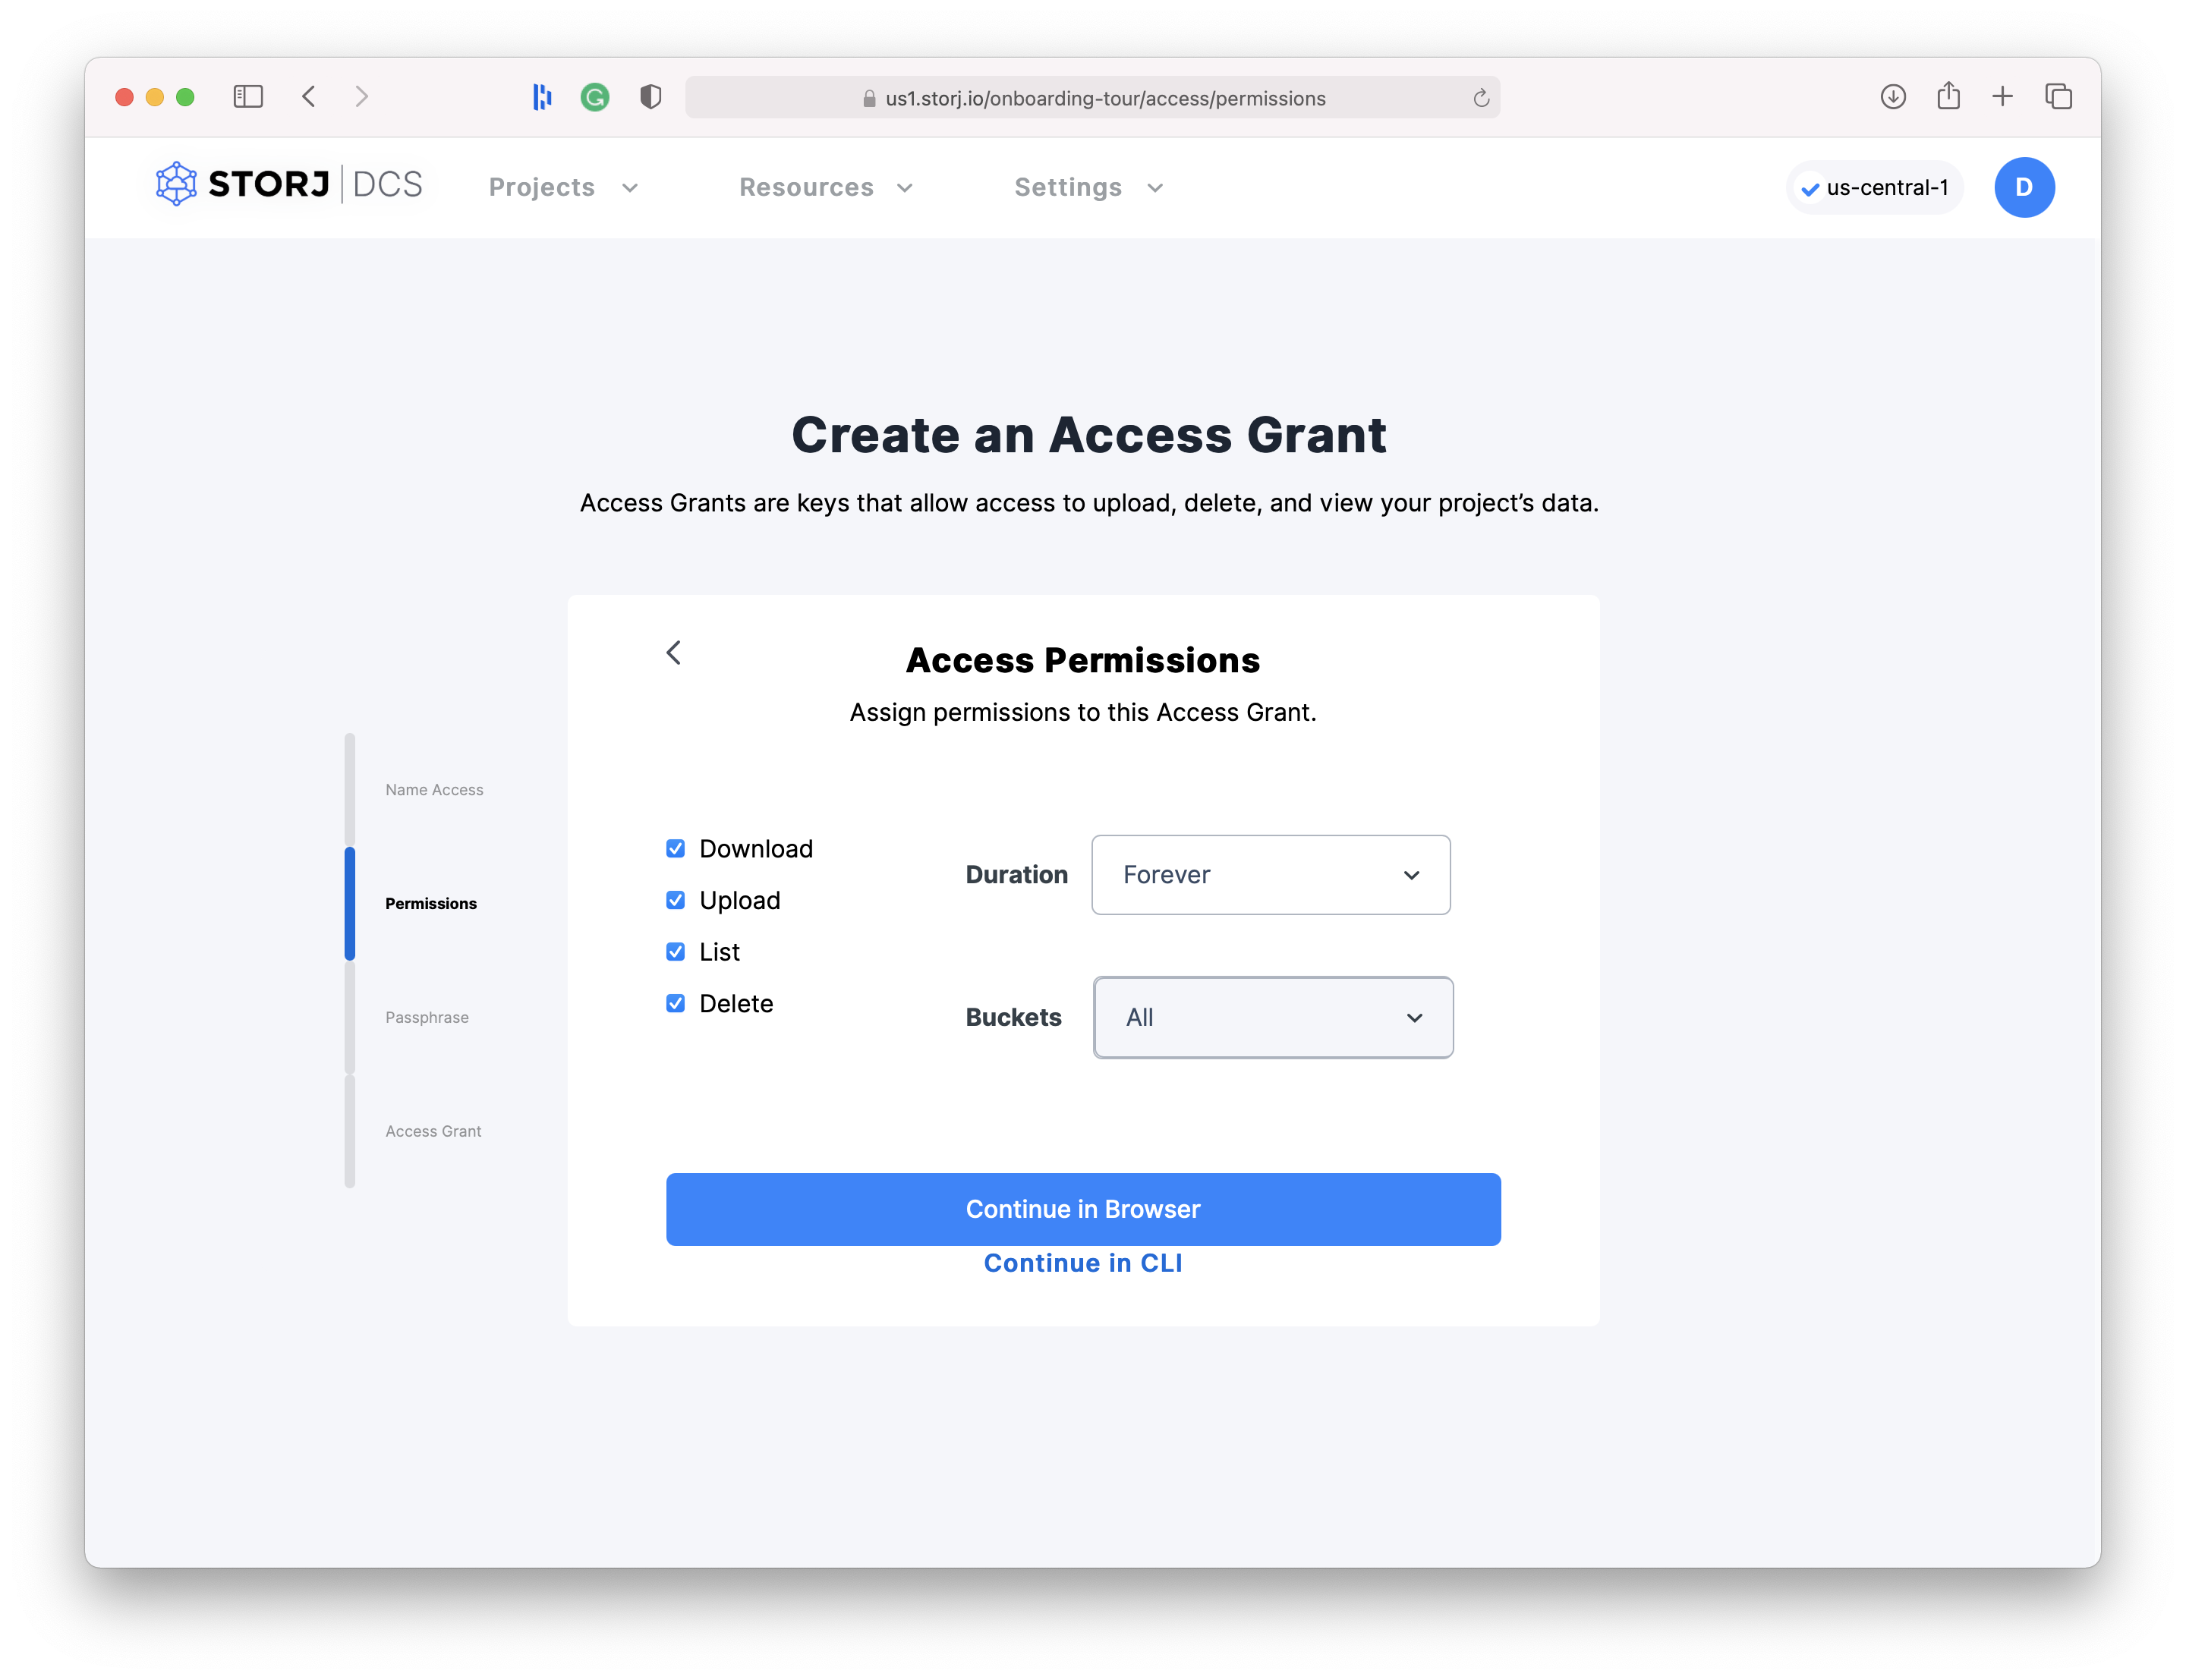
Navigate to the Access Management page within your project and then click on Create Access Grant. A modal window will pop up where you should enter a name for this access grant.
Assign the permissions you want this access grant to have, then click on Continue in Browser:
_If you do not feel comfortable entering this sensitive information into your browser, we understand. Storj does not know or store your encryption passphrase. However, if you are still reluctant to enter your passphrase into our web application, please select “Continue in CLI” and follow _Getting started instead.
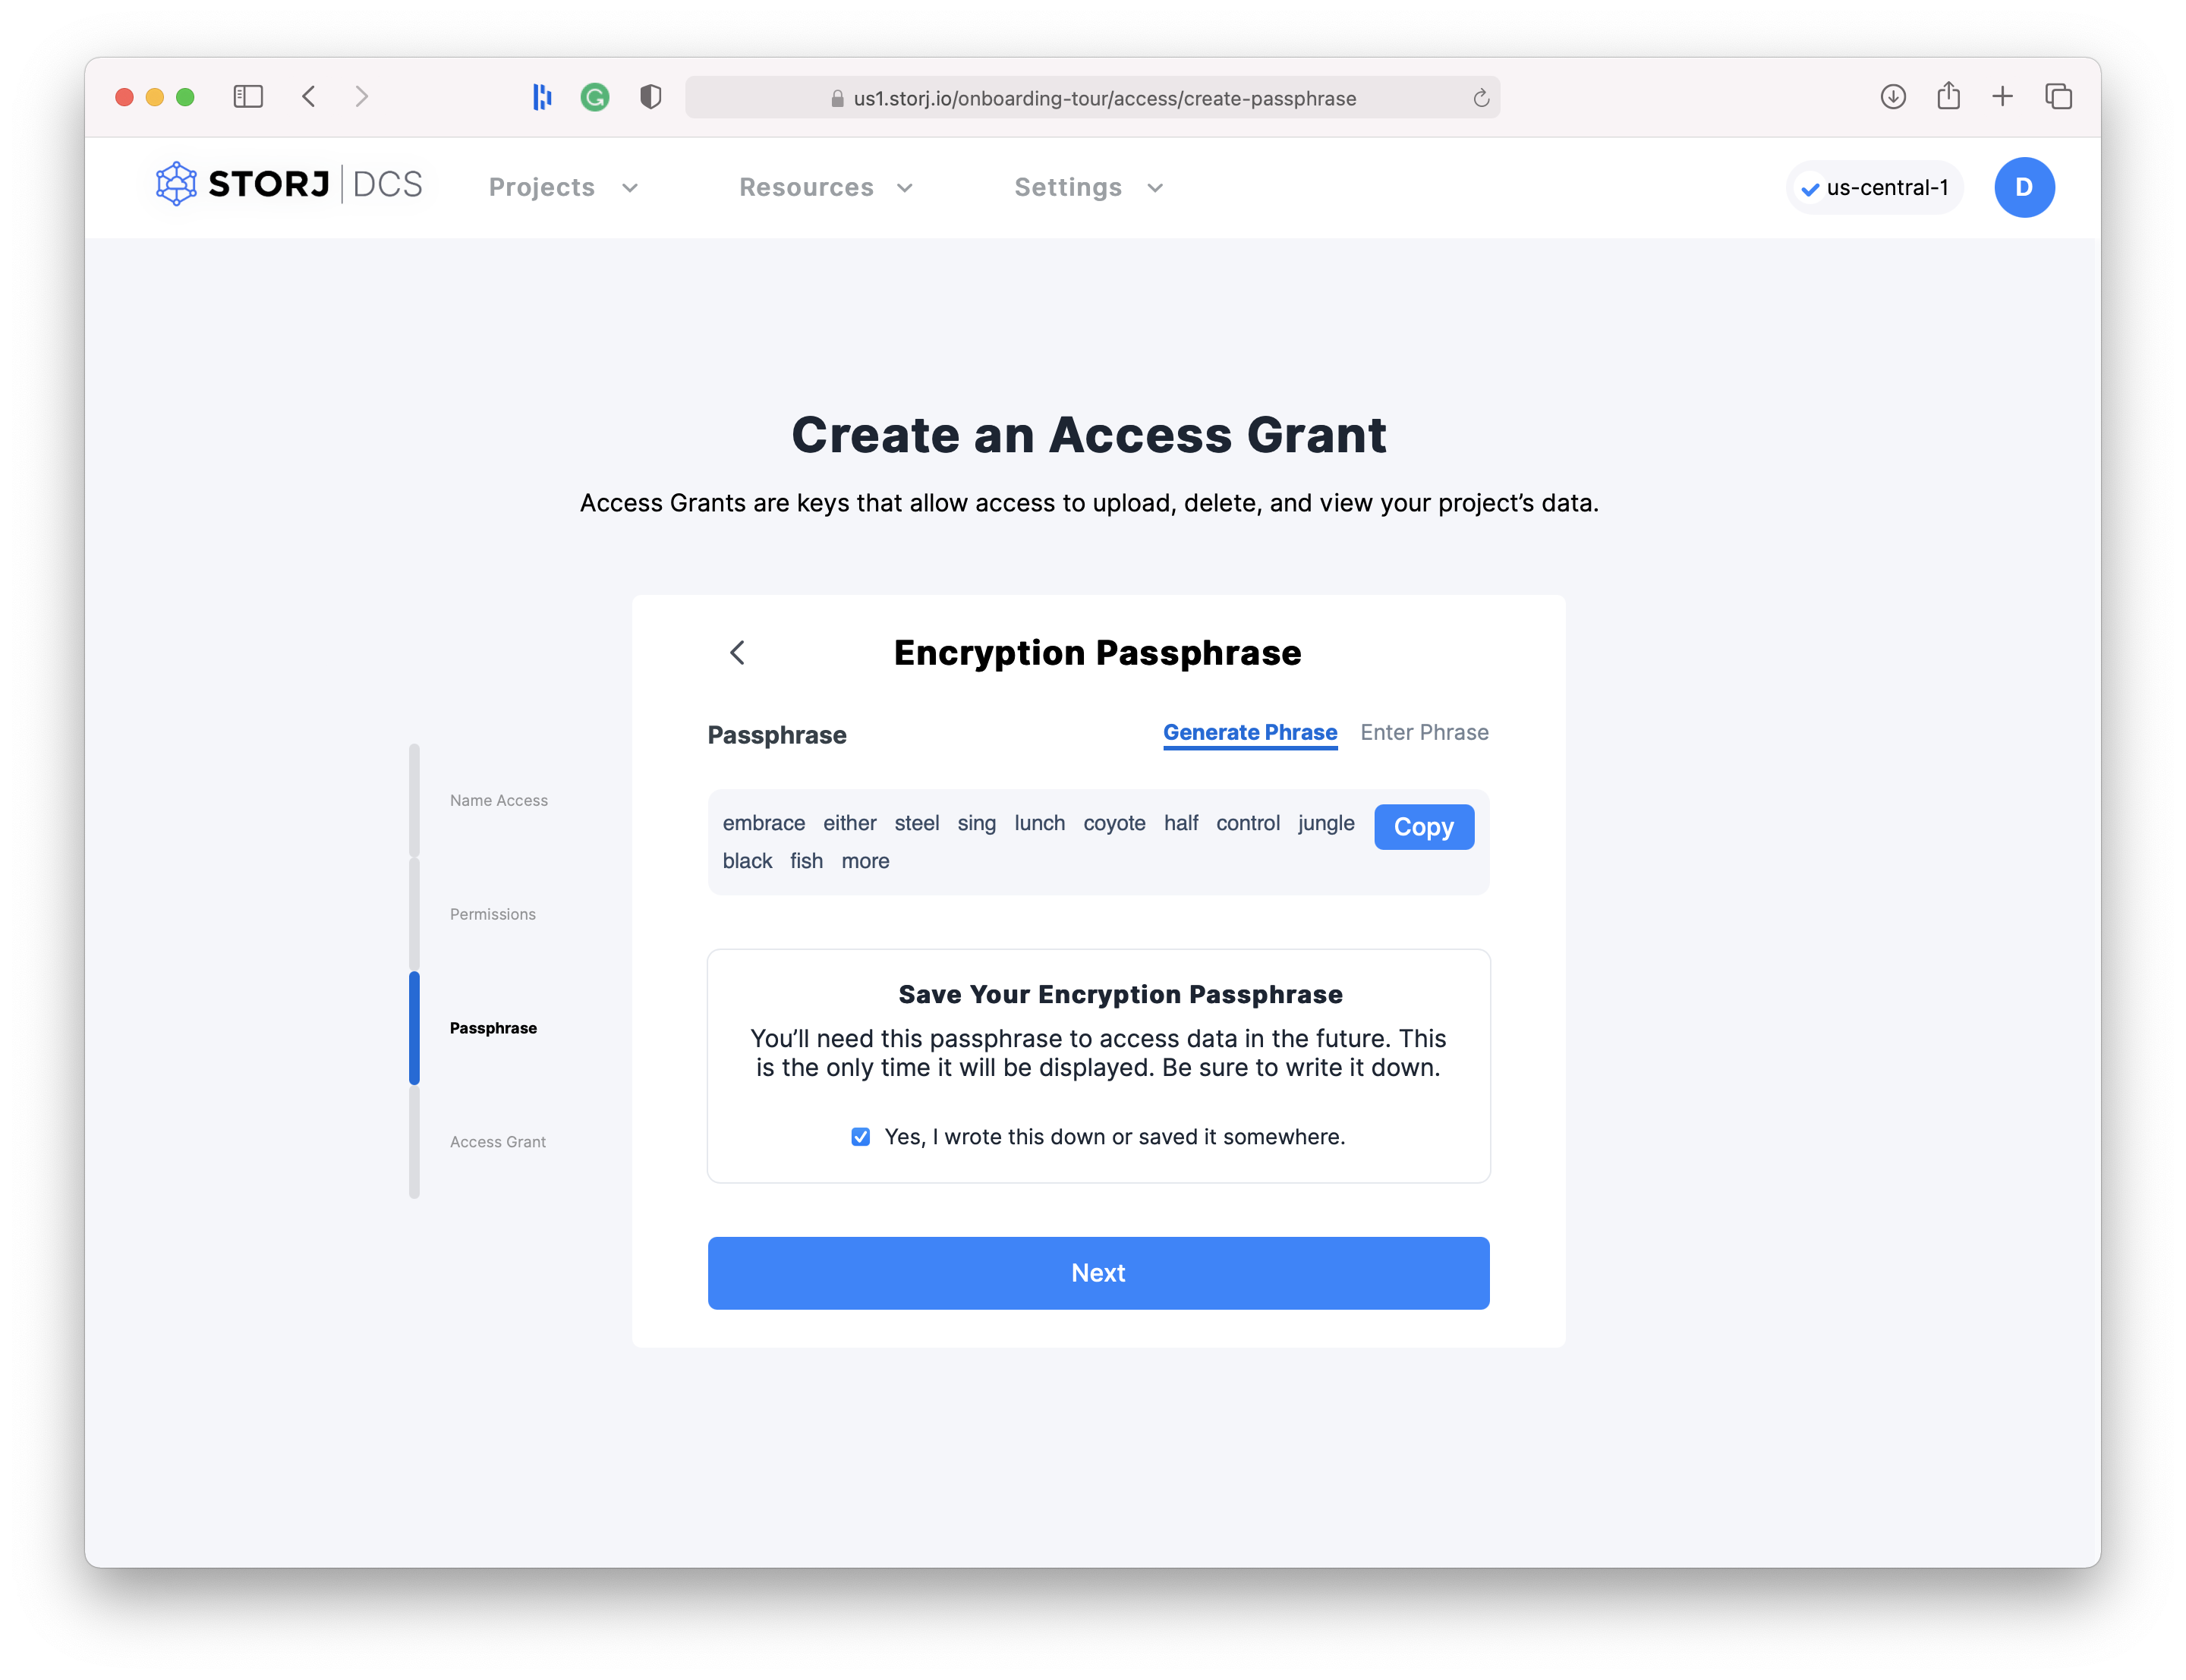
Generate and Save the Encryption Passphrase. If this is your first access grant, we strongly encourage you to use a mnemonic phrase as your encryption passphrase (The GUI automatically generates one on the client-side for you if you choose "Generate Phrase.") You will need this passphrase later if you want to again access files uploaded with this encryption phrase.
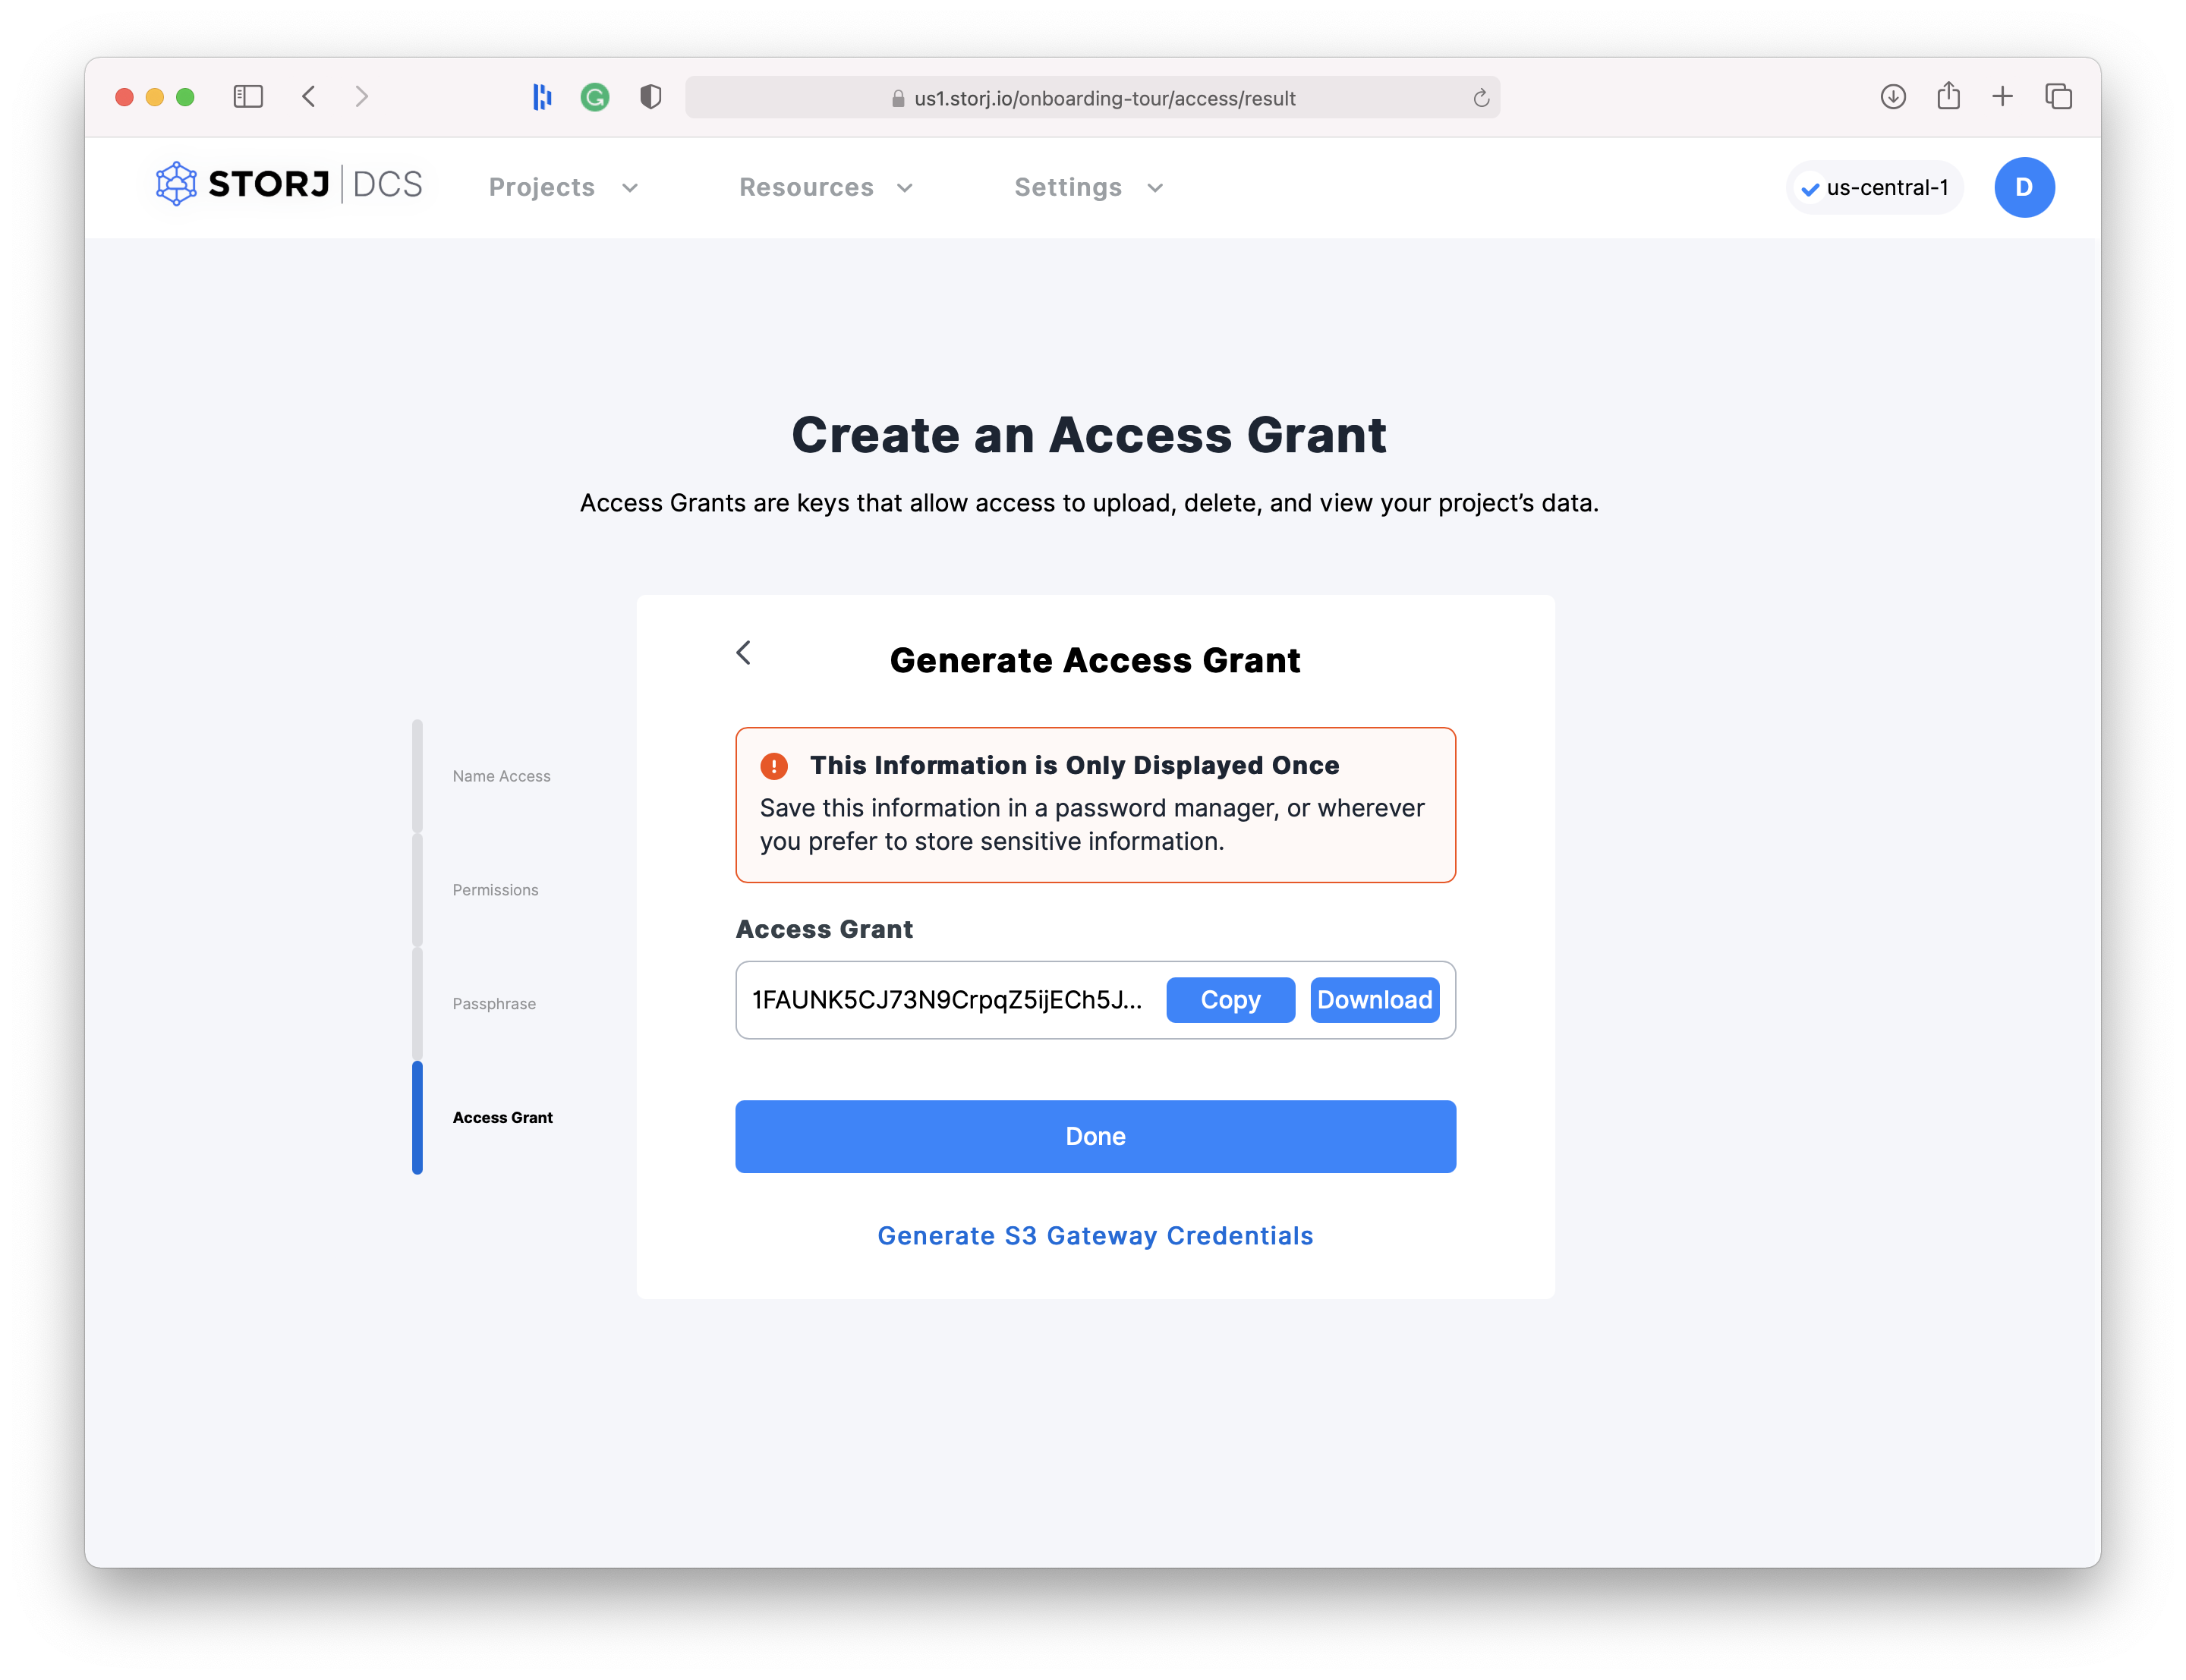
Be sure to download the Access Grant to save it and then click on the Generate S3 Gateway Credentials link.
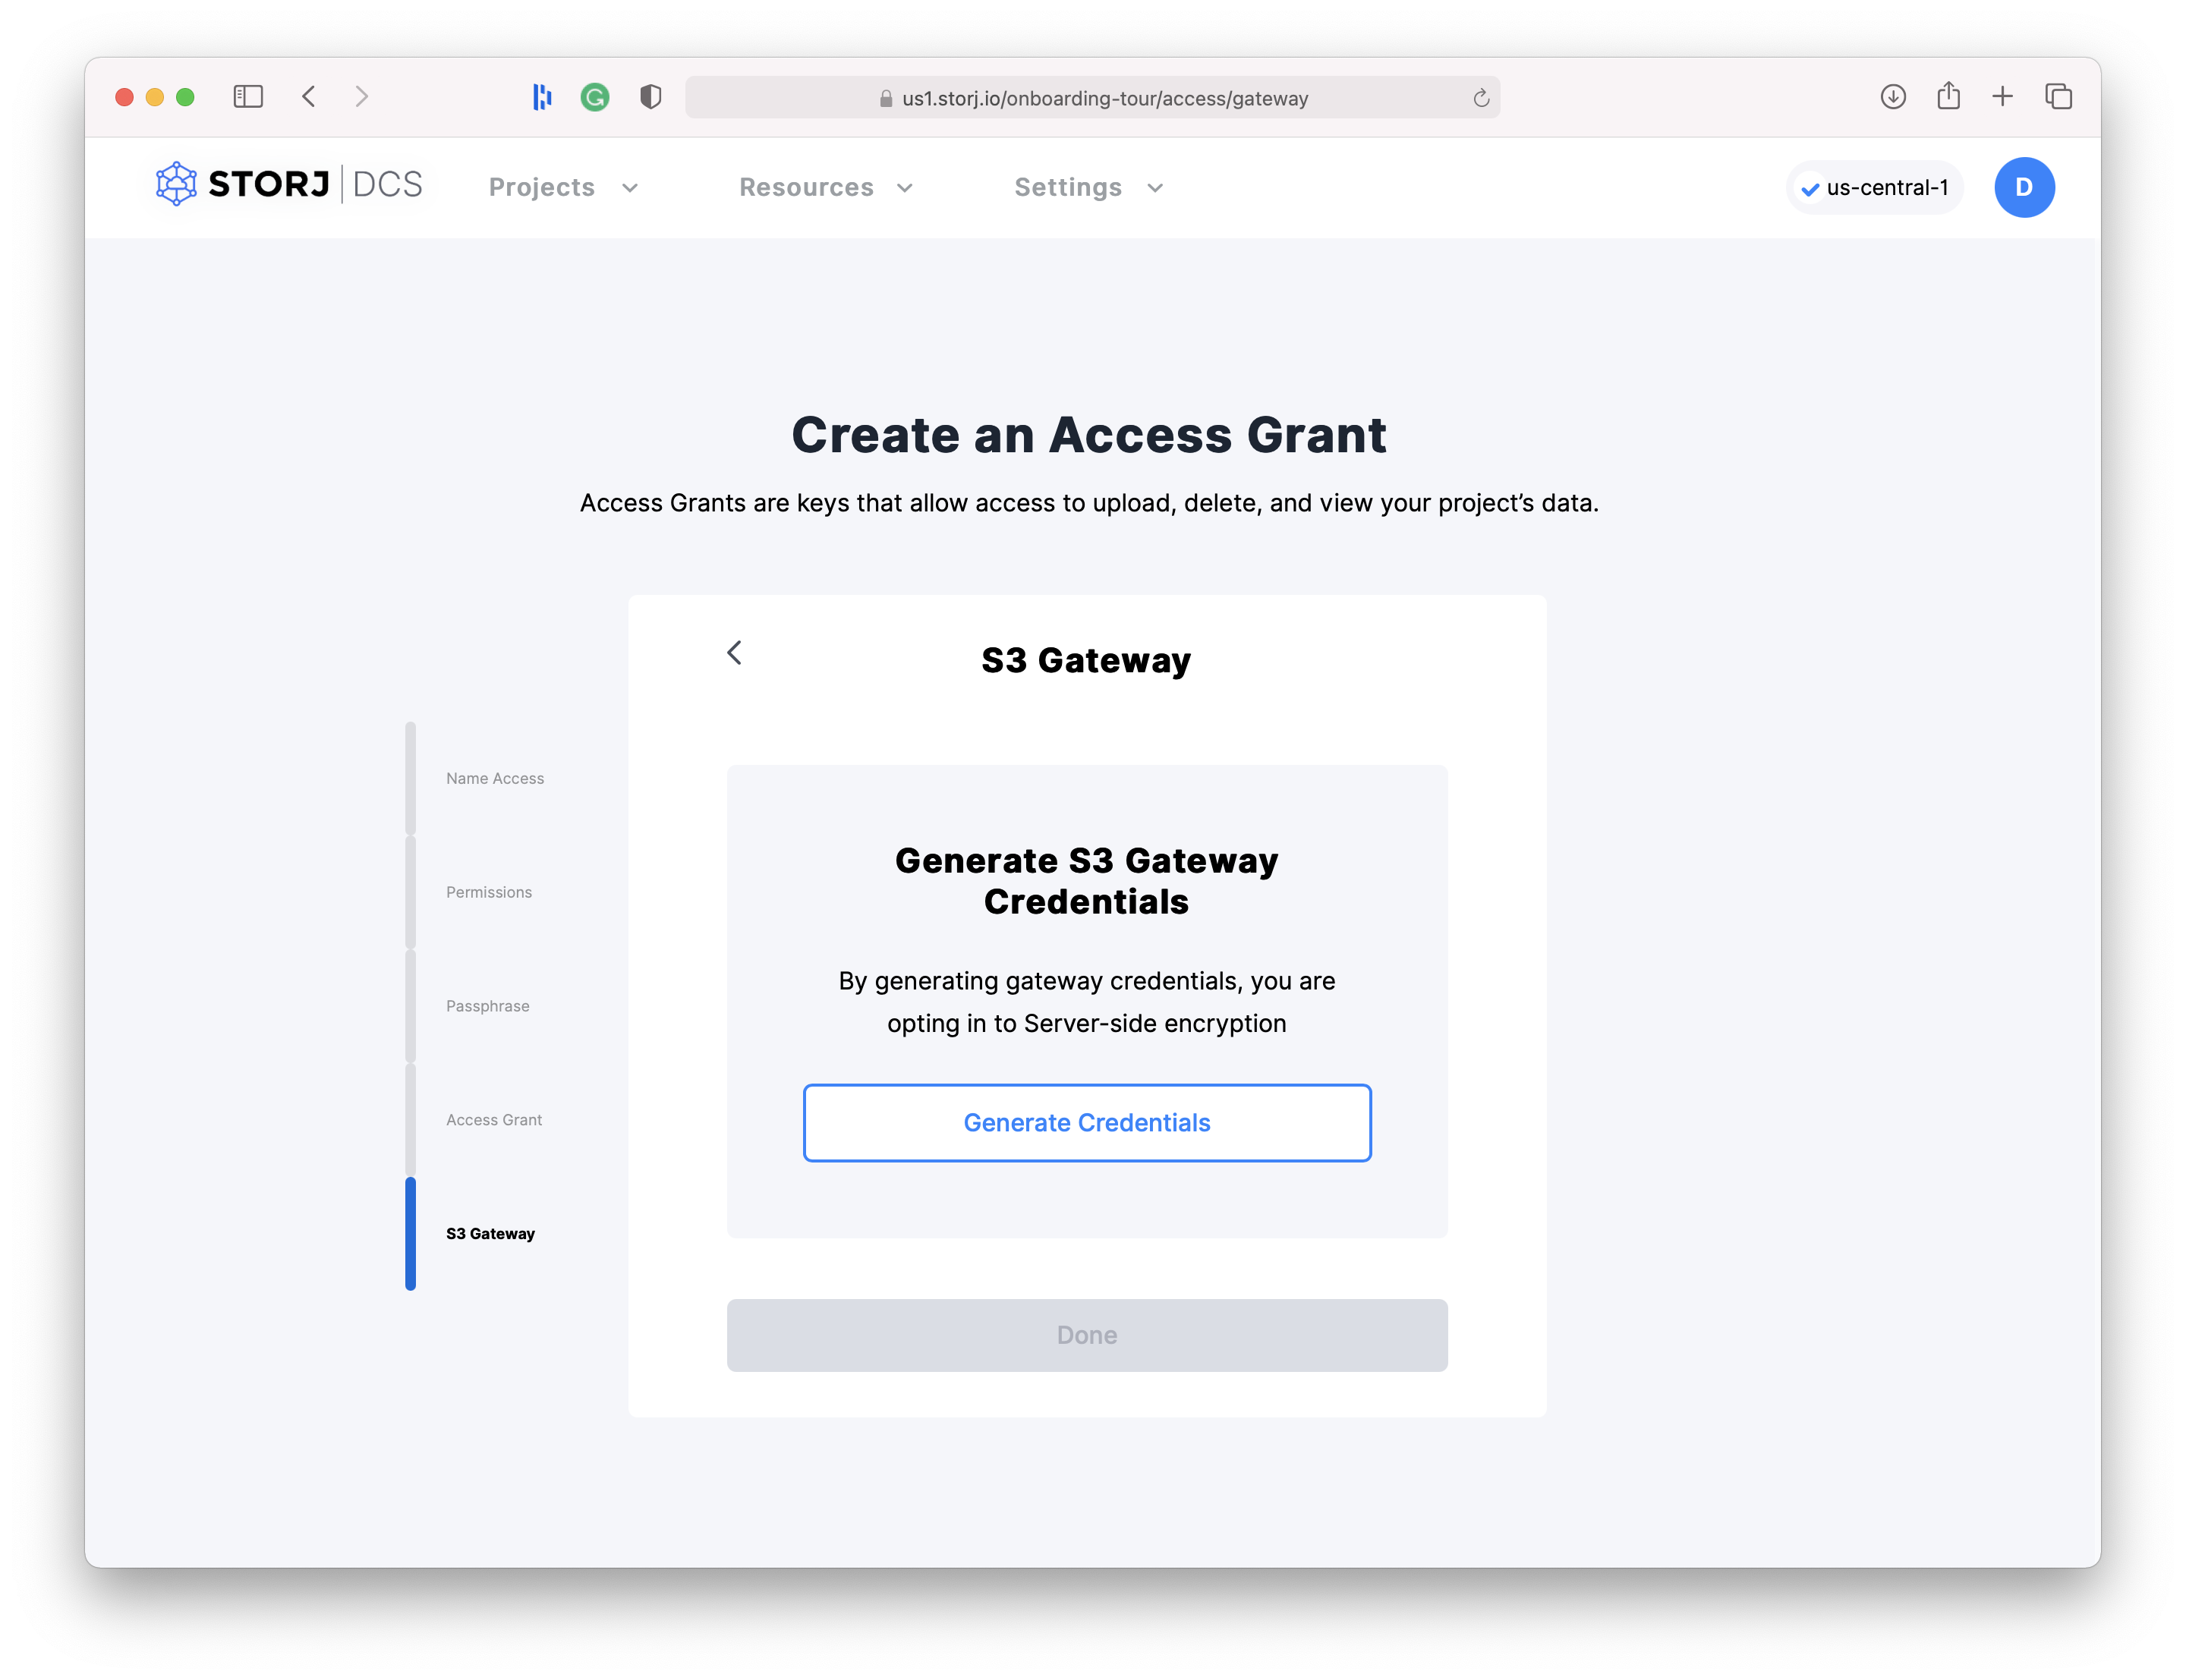
Now click on the Generate Credentials button.
Copy your Access Key, Secret Key, and Endpoint to a safe location.
Configuring Storj + Cyberduck
Whether using Windows or macOS, you’ll simply add the Storj Gateway S3 credentials into the CyberDuck client to establish the connection. Click the Open Connection button to create a new connection.
First, start by selecting S3 from the drop-down menu
Enter your S3 Gateway Credentials Endpoint for the Server selection (without
https://)Enter your S3 Gateway Credentials Access Key into the Access Key ID selection
Enter your S3 Gateway Credentials Secret Key into the Secret Access Key selection
Click Connect
For Mac OS
Back to the open connection in Cyberduck as we referenced above in Cyberduck you now have all the information you need to send files to your Storj network.
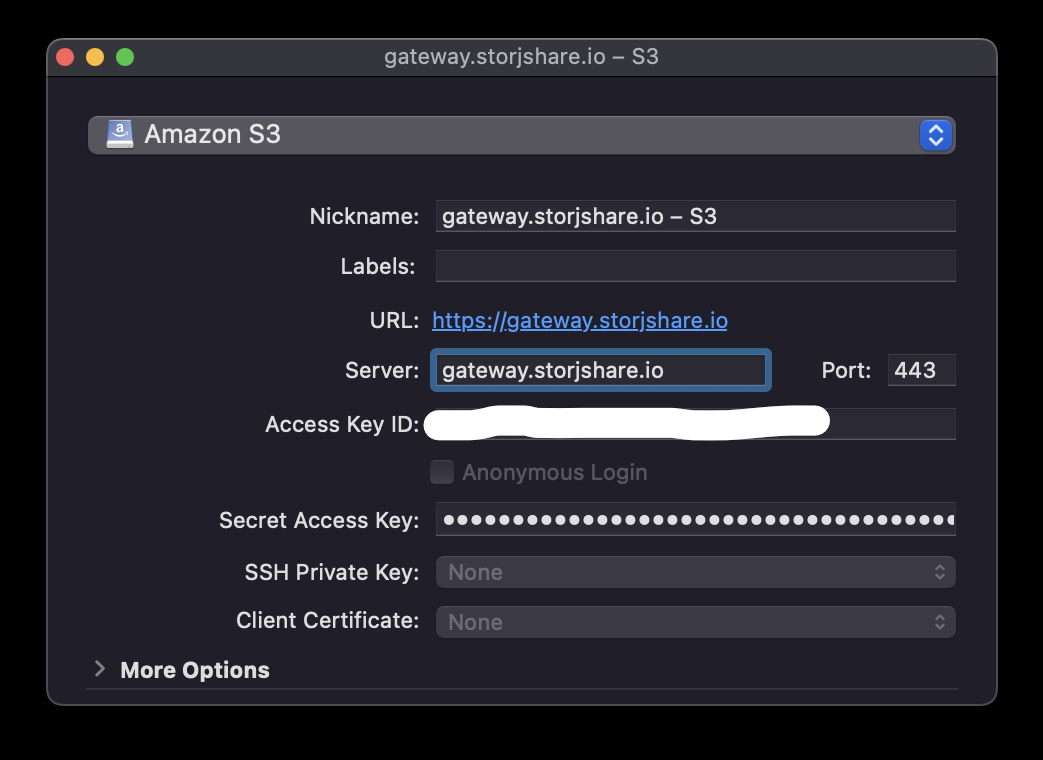
Select your saved bookmark Here, you'll see the Amazon S3 server window reopen. To move forward, you'll simply just add in your Storj Gateway S3 credentials that we previously configured.
Enter your S3 Gateway Credentials Endpoint for the Server selection.
Enter your S3 Gateway Credentials Access Key into the Access Key ID selection.
Enter your S3 Gateway Credentials Secret Key into the Secret Access Key selection.
Close the modal window and click the modified bookmark.
If you’ve added your S3 Gateway Credentials properly, you’ll see your Storj buckets, and you can now drag and drop files to your Storj network seamlessly and easily via the Cyberduck GUI. Congrats!
