User Guide: macOS Native App
This guide walks you through the core steps to get started with Object Mount on macOS, including: activation, adding credentials, and mounting your cloud-based object storage as a local volume.
Step 1. Launch Object Mount
Once Object Mount and macFUSE have been installed on your Mac (see the macOS Installation Guide), follow the steps below to launch and activate Object Mount:
Step 2. Configure S3 Credentials & Create a Mount
Object Mount can connect to object storage from Storj as well as other major cloud storage providers. Standard S3-compatible credentials from your cloud storage provider are required.
Obtain Your Object Storage Credentials
- See the Appendix article S3 Credential Management for instructions.
Enter Your Credentials and Create a Mount
There are two easy paths to create a mount — both paths achieve identical results and both require your object storage credentials:
- Click Create New Mount from the Mounts tab, or
- Click Add New Credentials from the Credentials tab
- Then select and configure one or more buckets to mount as a local drive
Follow the steps below to create a new mount using the Add New Credentials path:
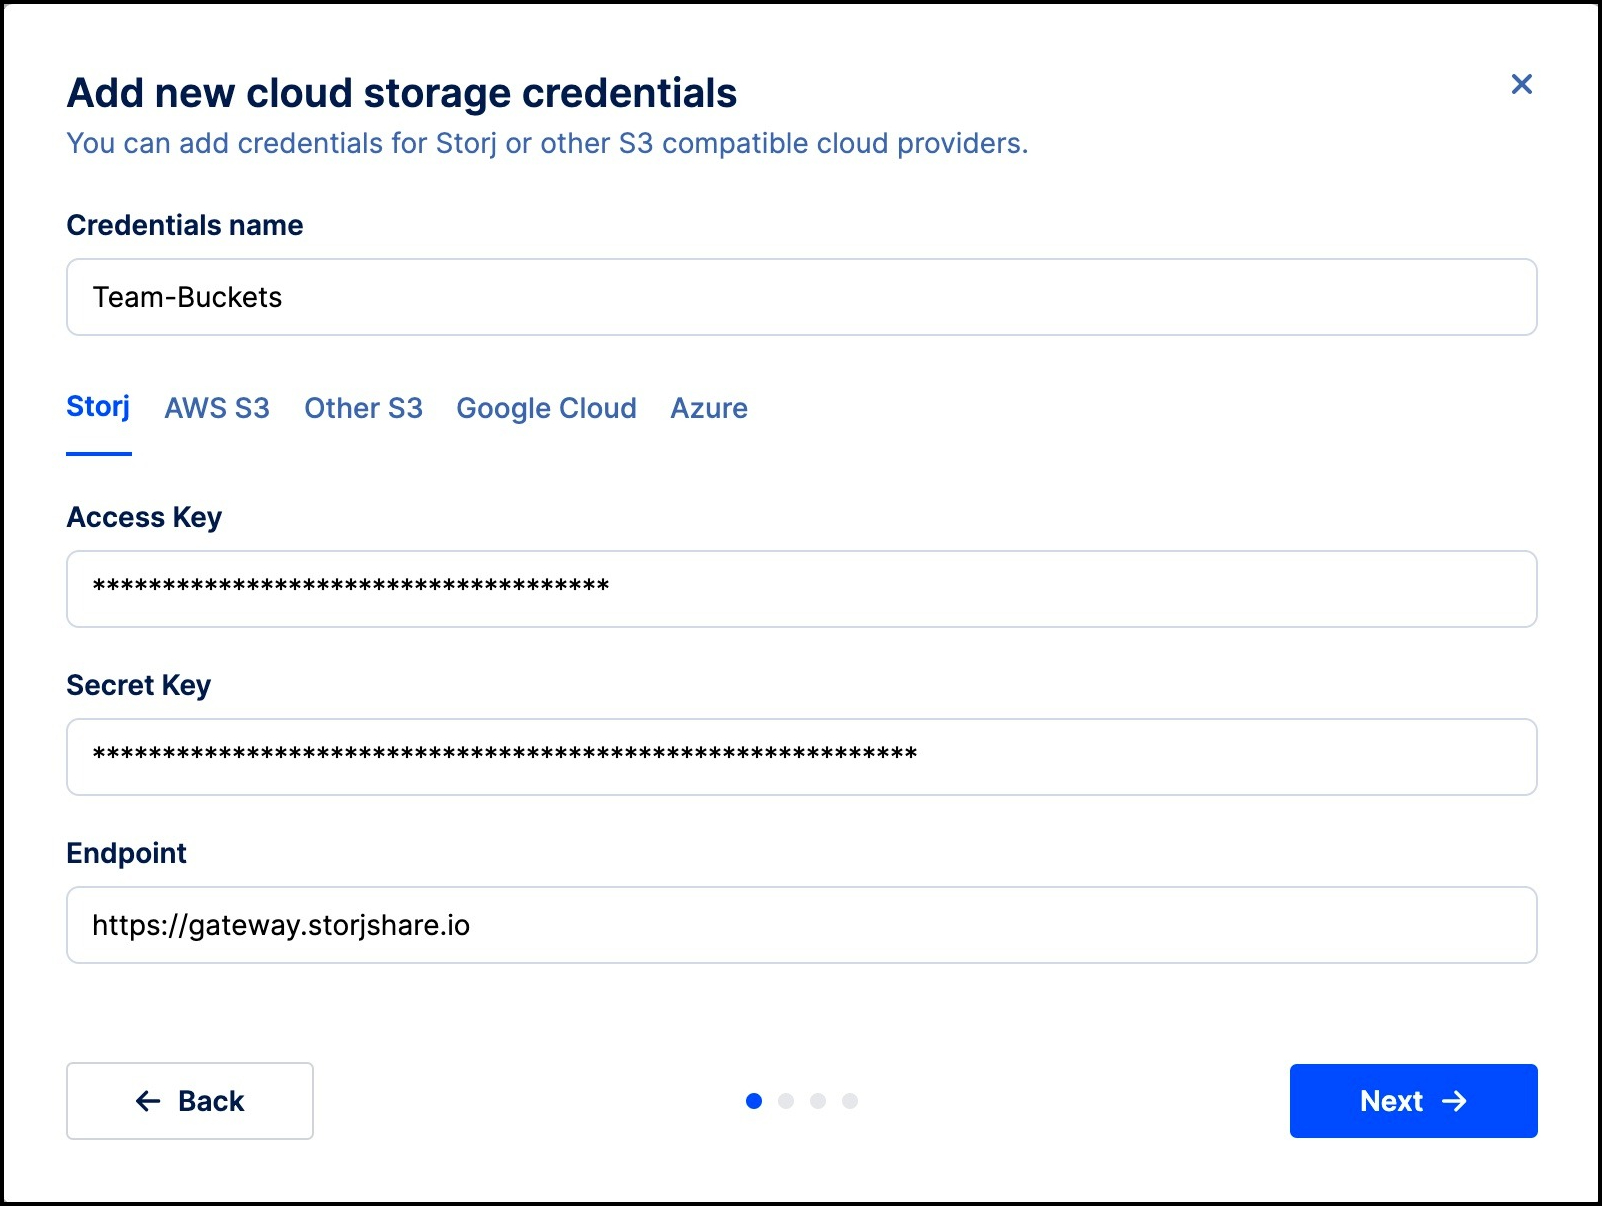
Select the Credentials tab in Object Mount.
Click the Add New Credentials button.
- Give the credential set a clear name.
- Choose your provider tab (e.g.: AWS, Storj, etc.).
- Enter the Access key ID, Secret key, and Endpoint (or Region, if applicable) that you obtained earlier.
S3 Compatible Providers
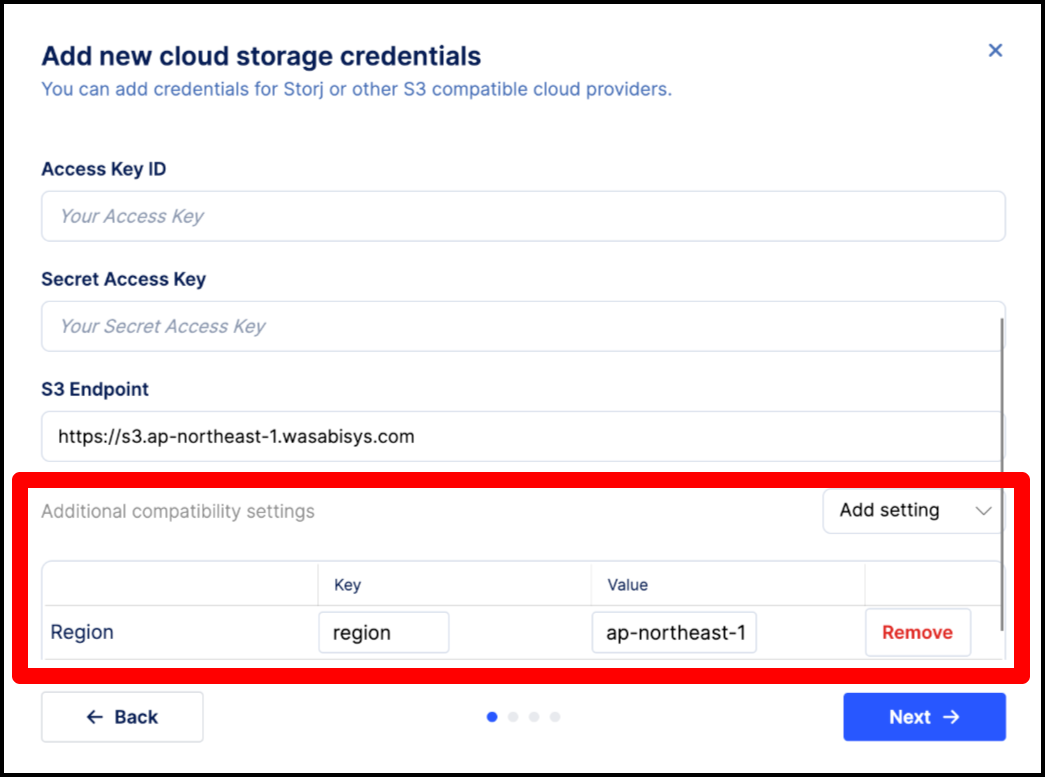
If your provider is not listed, select Other S3 and choose the provider from the dropdown.
- Ensure the endpoint is accessible from the Internet.
- Some providers may require extra compatibility settings like a defined region.
Below is an example of providing an additional S3 Compatibility Setting for region:
Click Next.
- Object Mount will authenticate to your cloud storage provider and attempt to discover any buckets your credentials have access to.
Select Mount all buckets or choose one or more specific buckets to create a mounted drive for, then click Next.
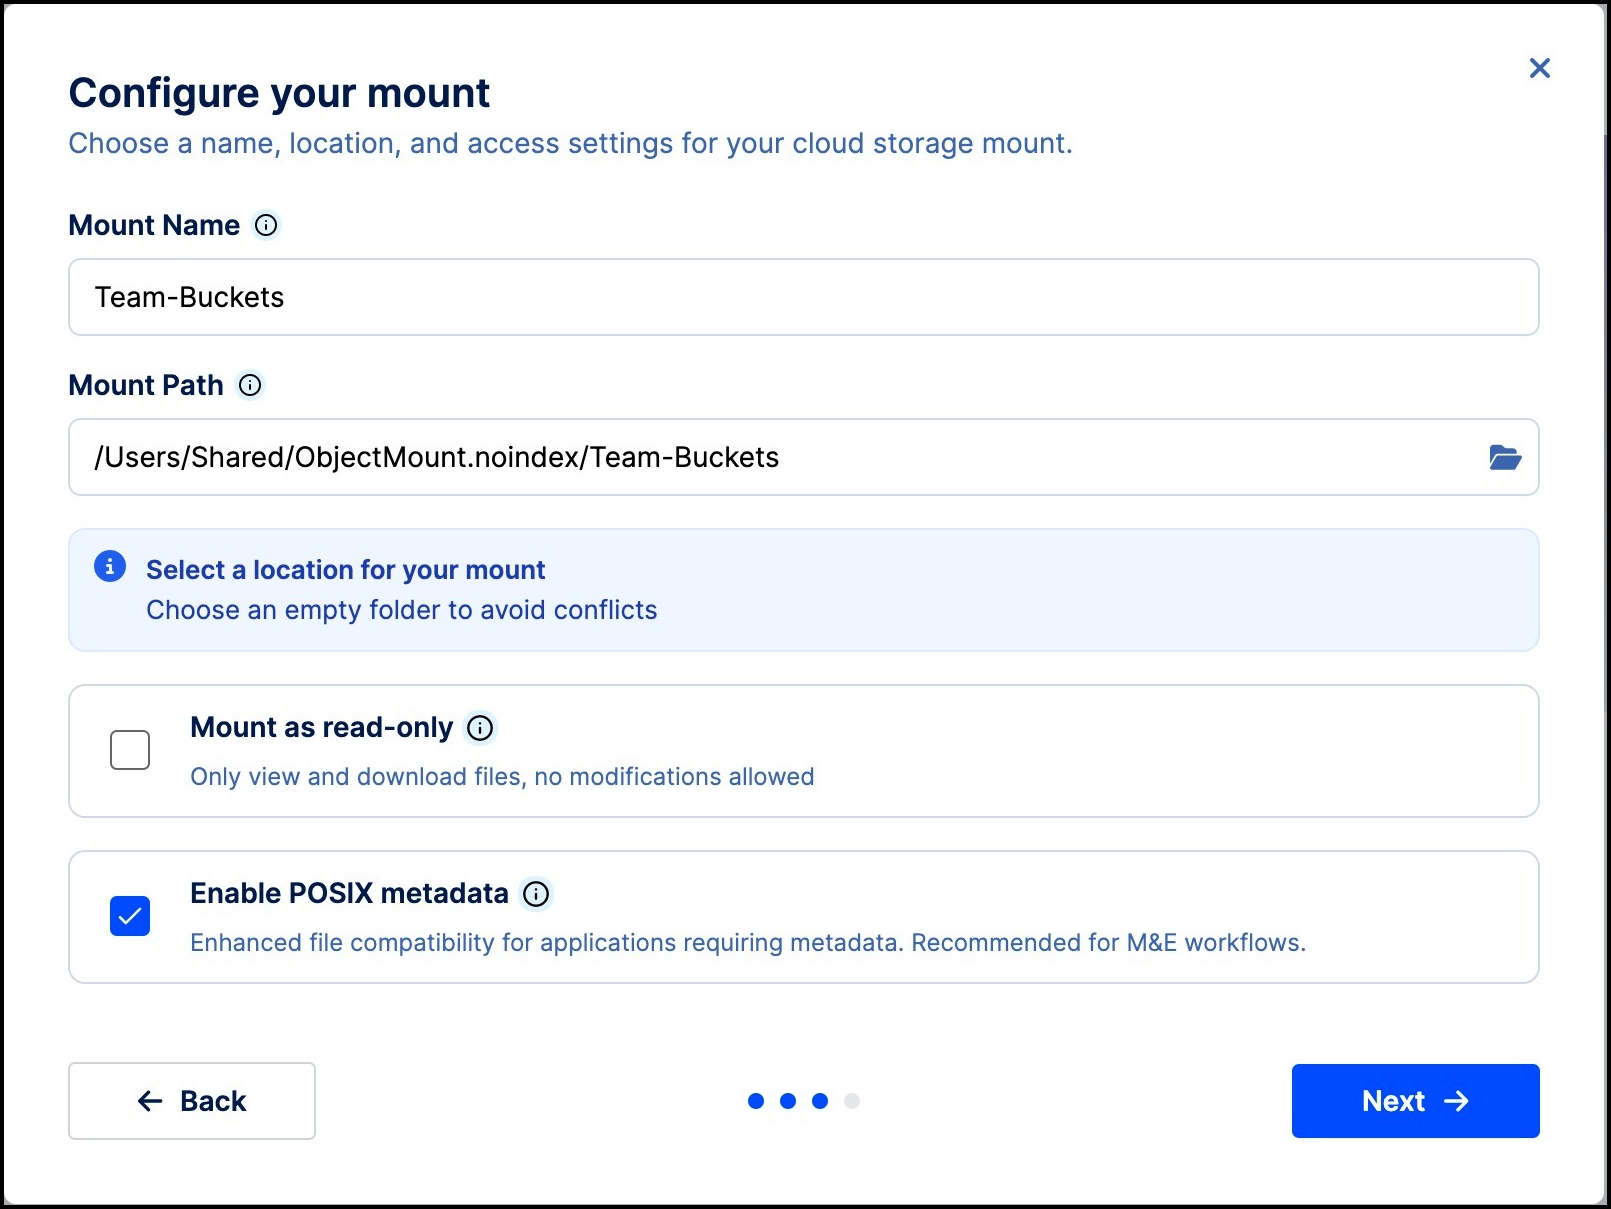
Enter a Mount name to use and, if necessary, alter the path location for the local mount drive.
Tick the Mount as read-only box if all you need is to browse and copy content.
- Uncheck the box to enable full read/write access.
Tick the box to Enable POSIX metadata (recommended).
- For more details, see the Appendix article: POSIX Explained.
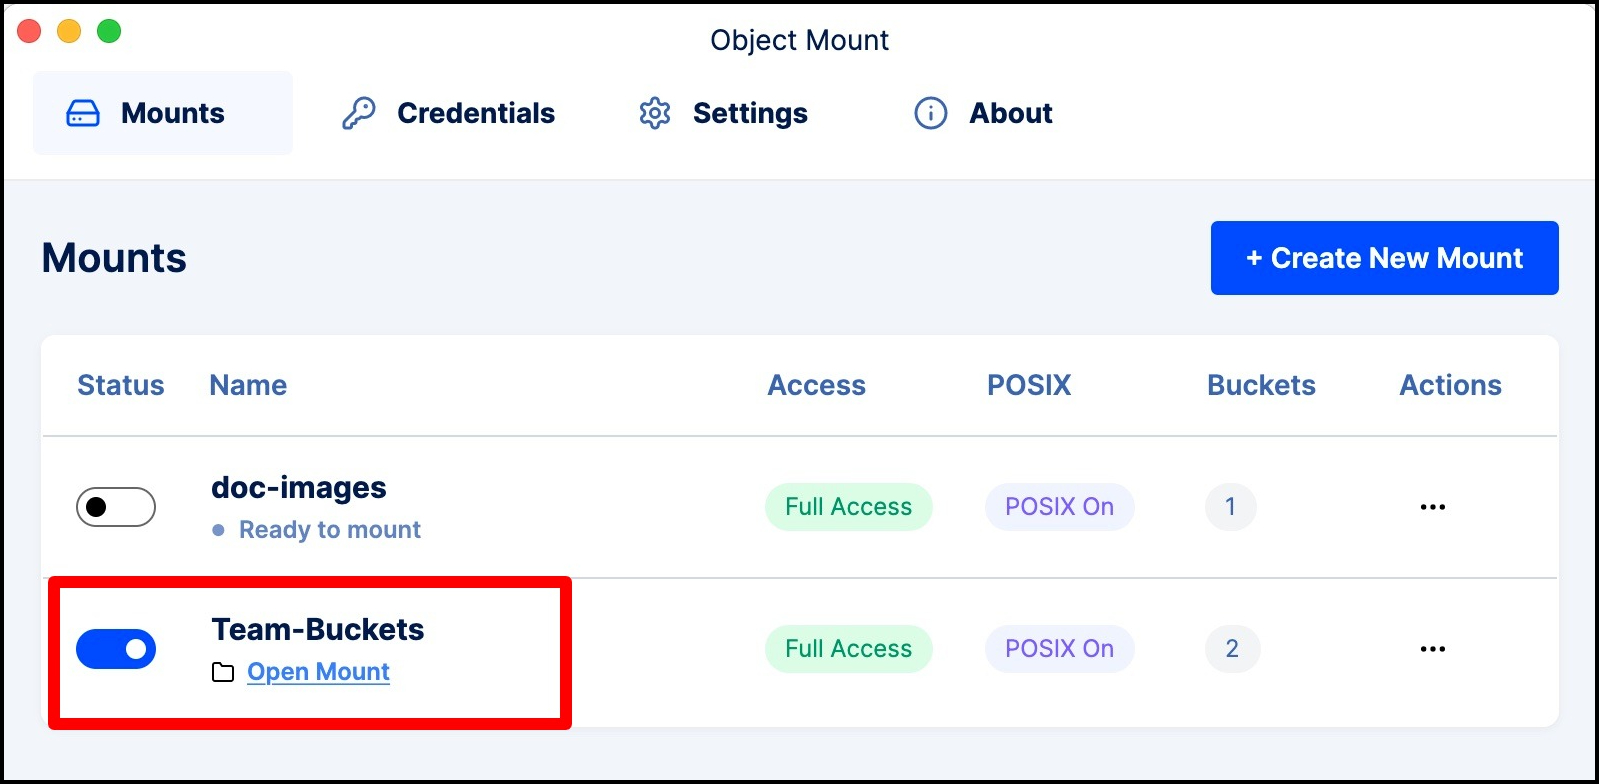
Click Next to create the mount. Then enable the mount from the Mounts tab.
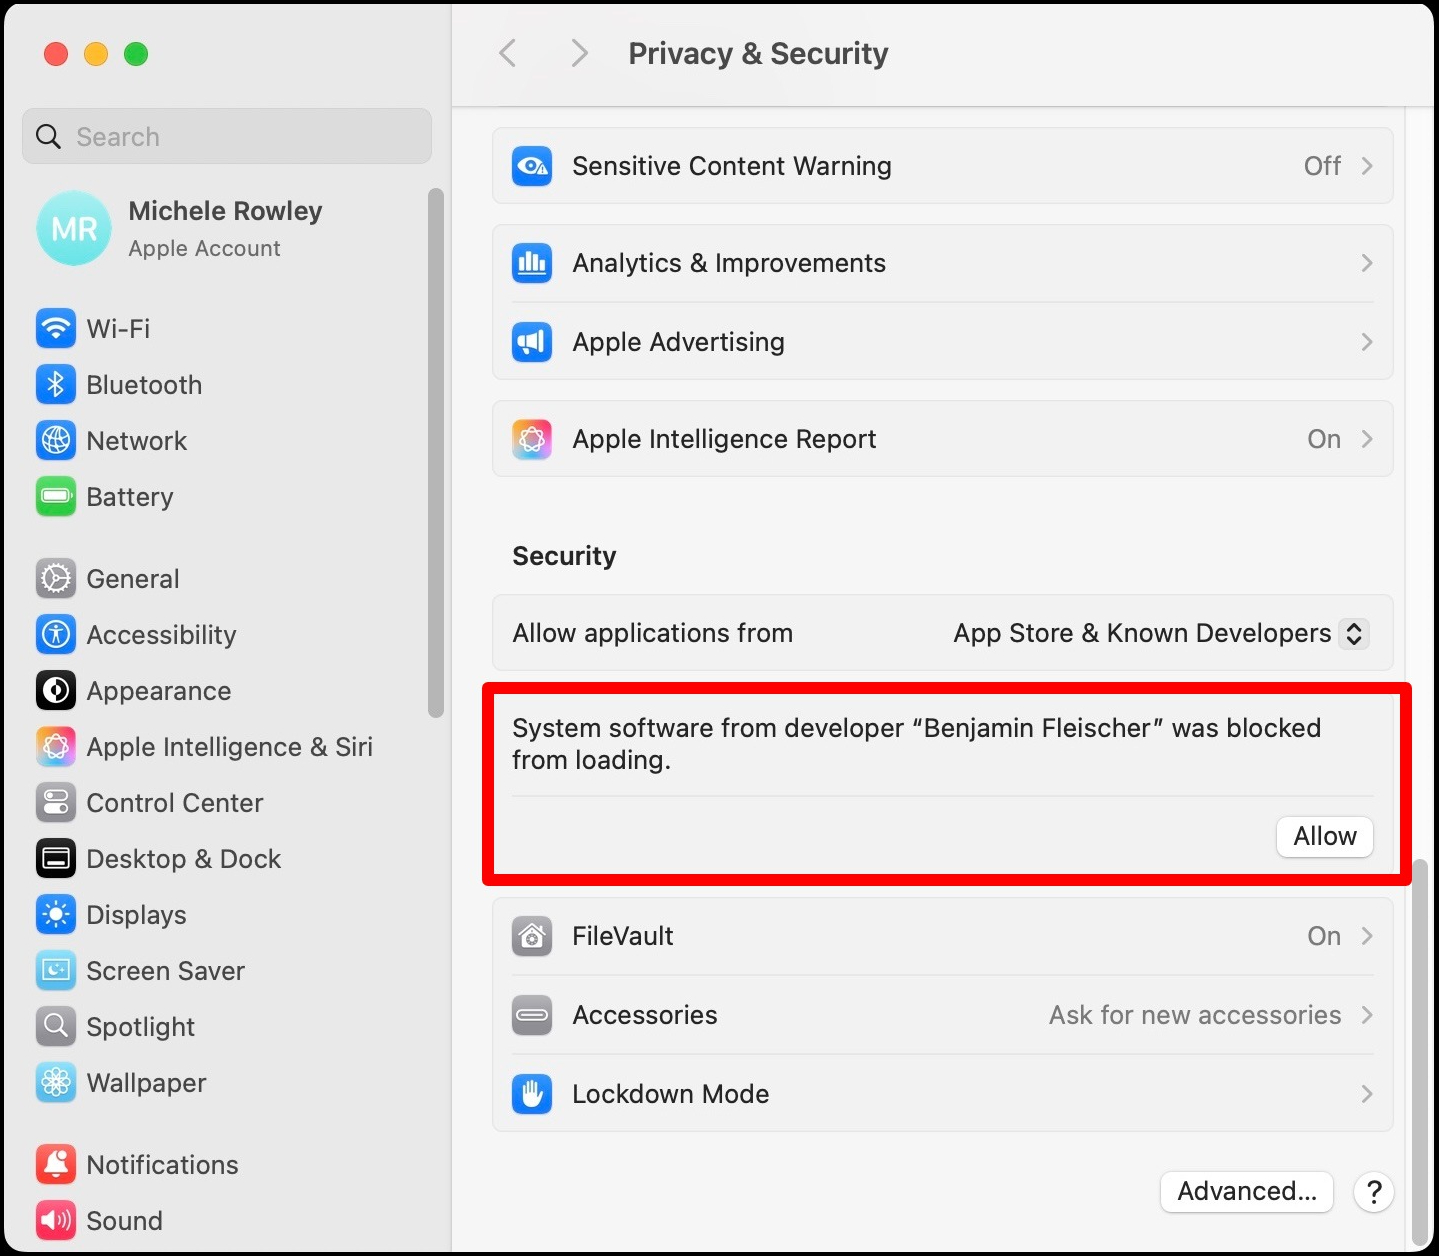
“Extension Blocked” Message
Depending on your Mac hardware and OS version, an “Extension Blocked” message may be presented when Object Mount attempts to mount your new drive.
If so, perform the following steps:
- Open System Settings
- Navigate to Privacy & Security
- Scroll down to the Security section
- Click Allow to permit the macFUSE extension (from developer “Benjamin Fleischer”) to be loaded
Note: First-time access to a new mount may take a few moments if the bucket contains many files — performance improves after the initial mount.
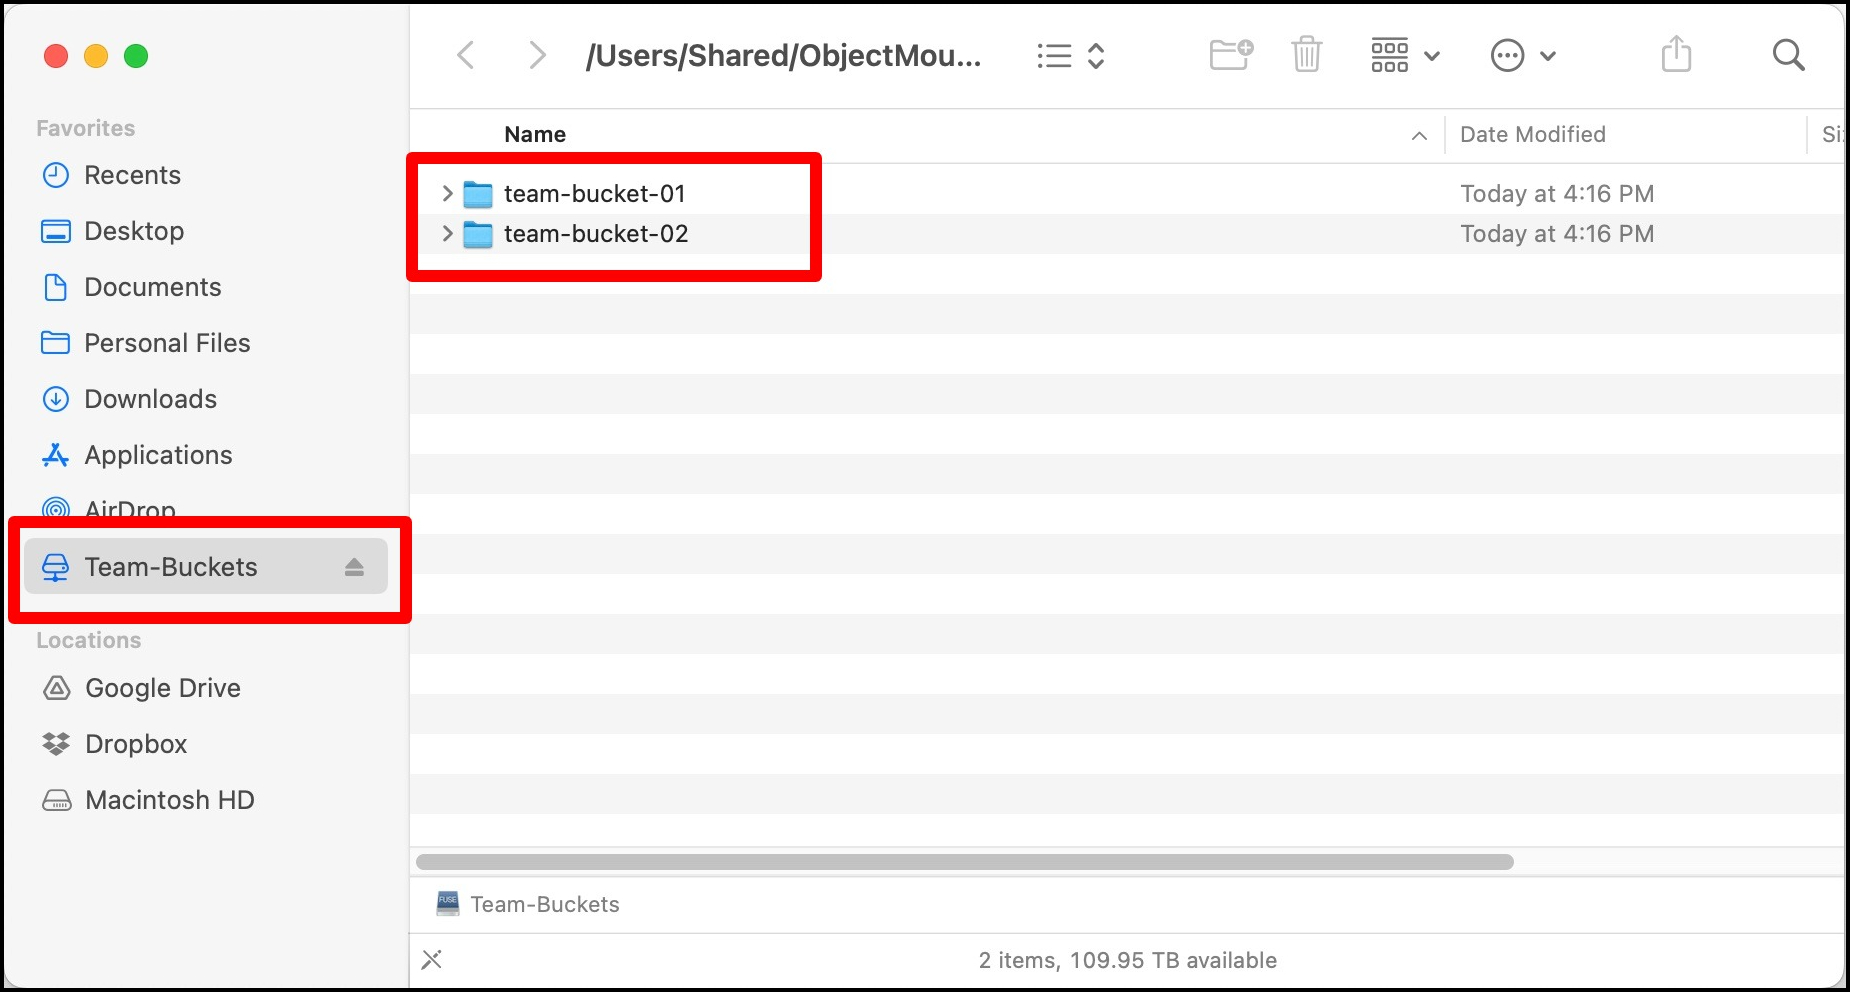
Newly Mounted Drive & Buckets
Your newly mounted drive will appear on your Mac using a FUSE drive icon:
![]()
If there are multiple buckets accessible using the same credential set, those buckets will each appear as separate folders within the single mounted drive icon:
Preferences & Advanced Settings
Object Mount for macOS includes a flexible Settings panel where you can fine-tune caching, logging, and performance settings.
Settings
- These settings are global and apply to all mounts.
- These settings cannot be edited while a mount is active. Disable all mounts before making changes.
Refer to the following sections for details on each setting:
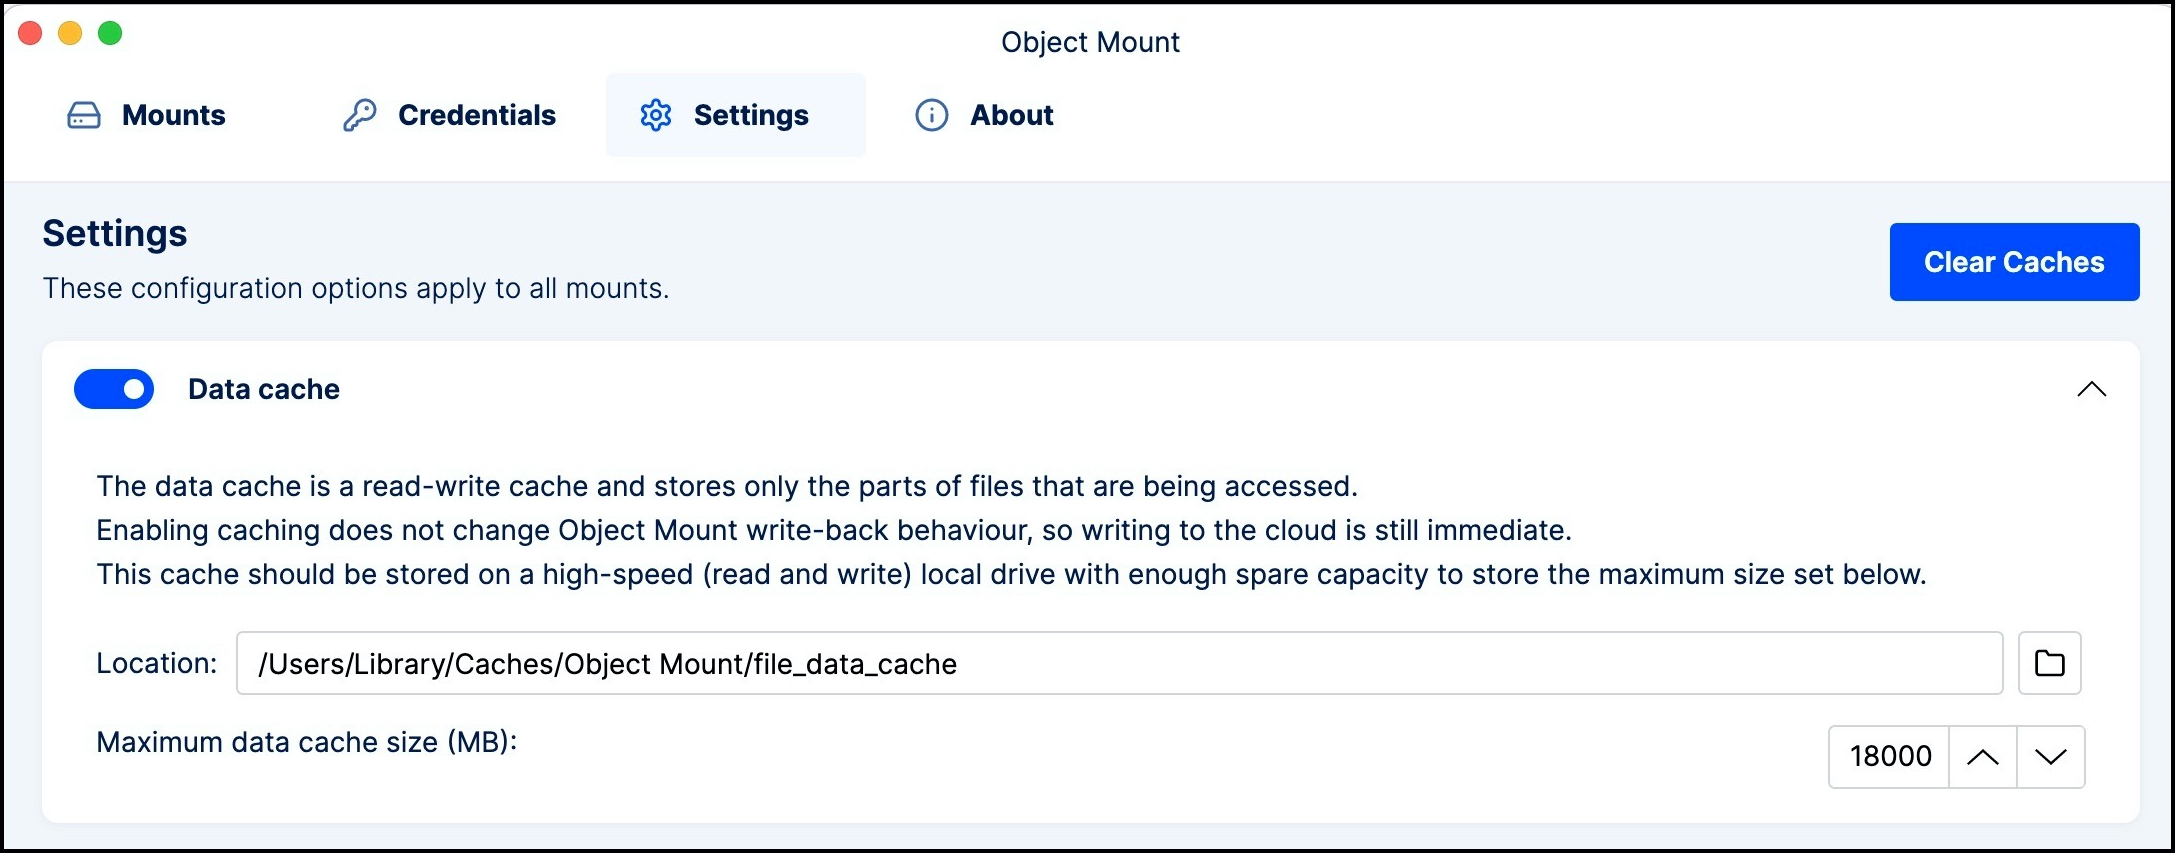
Data Cache
The local Data Cache temporarily stores small portions of accessed cloud files on your local disk — useful for repeated or random access operations.
Location: The local path where data cache files are stored
Maximum cache size: The upper limit (in MB) for total cached data
- Note: This feature does not delay cloud writes — writing to the cloud happens immediately.
Data Cache Recommendations
- Use a fast local drive (SSD or NVMe) for best caching performance.
- If the connection to your object storage is on a high-speed, low-latency network, you may see improved performance by turning caching off.
Metadata Cache Settings
Metadata caching helps Object Mount load and retain file structure, timestamps, and permissions more efficiently.
- Location: The local folder for storing metadata information
- Cache timeout: The duration, in seconds, that metadata remains valid before being refreshing from the cloud (default: 60 seconds)

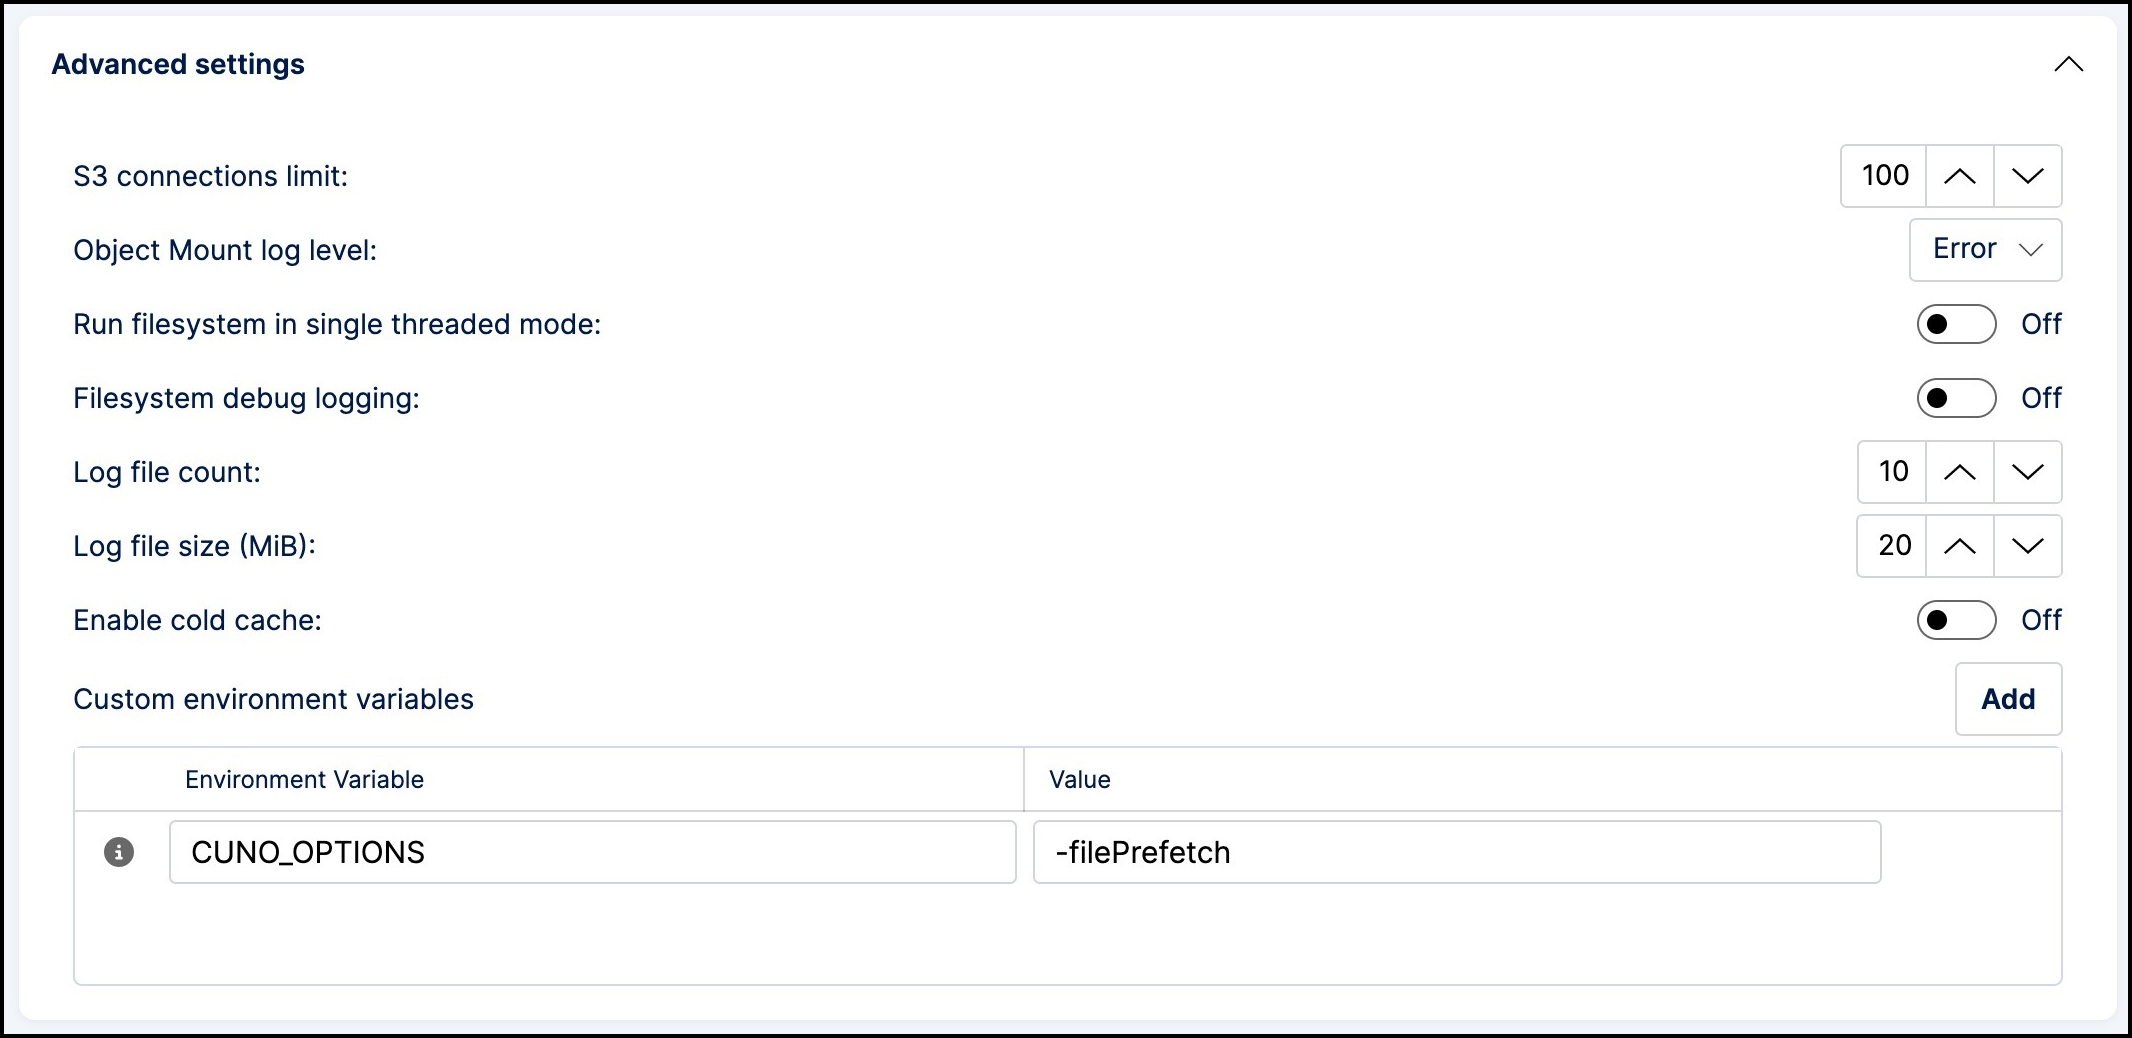
Advanced Settings
These options let you further customize Object Mount’s performance and diagnostic behavior.
| Setting | Description |
|---|---|
| S3 connections limit | Controls the number of concurrent S3 operations (default: 100). |
| Log level | Adjusts logging detail. Options: error, warning, debug, or trace. |
| Single threaded mode | Runs the filesystem in single-threaded mode (rarely needed; leave off unless instructed by Storj Support). |
| Debug logging | Enables extensive debug output to assist with support issues. |
| Custom Environment Variables | Custom variables to modify Object Mount’s behavior, add variables when recommended by Storj Support. |
Log File Location
On macOS the default location for storing the log file is:
~/Library/Application Support/Object Mount/cunoFS.log.
Click Apply to save any changes. Then re-enable your mount.
Click Reset to revert all settings back to their default values.
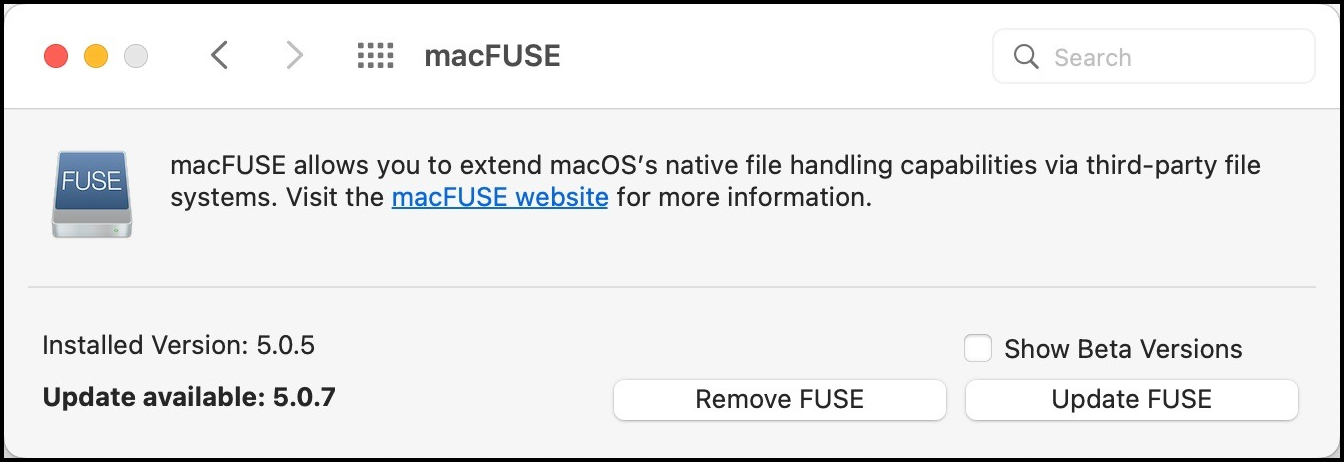
Updating macFUSE
You can update and/or uninstall macFUSE within the Mac’s System Preference.
For macOS versions Monterey and prior, you will find the macFUSE extension at the bottom of the System Preferences window:
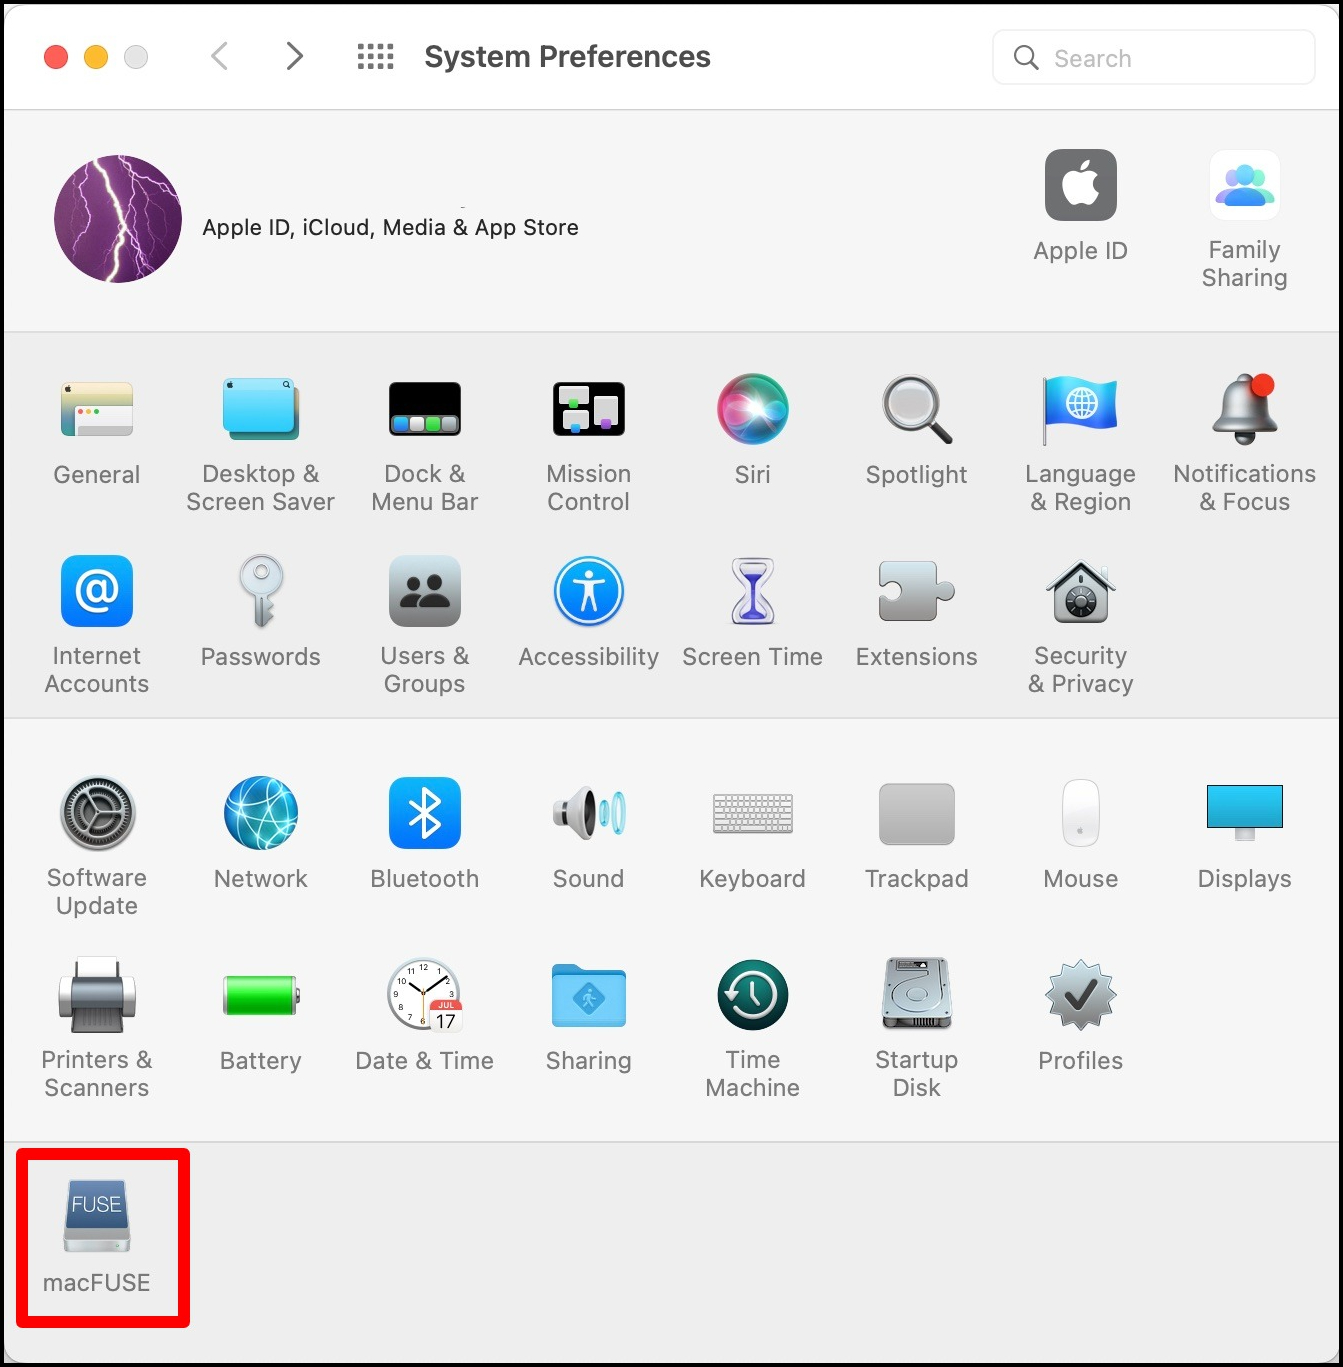
Click the macFUSE icon to see options to update and/or uninstall macFUSE: