Installation Guide: macOS Native App
This section covers how to install the Object Mount native application for macOS using a standard .dmg image.
The steps below work for Macs with either Intel processors or Apple Silicon (M1-M5) chips.
System Requirements
Before you begin, make sure your Mac meets the following system requirements:
macOS 12 Monterey or later
(Note: macOS 13 Ventura or later is required for advanced features such as Fast Copy & Fast Move.)
At least 300MB of free disk space
Internet connection for mounting cloud-hosted buckets, or LAN connection for mounting local S3 buckets
macFUSE 4.8.2 or later must be installed (see instructions below)
S3 Provider Support:
Object Mount for Mac fully supports S3 container services from Amazon Web Services, Storj, and other fully S3-compatible Object Storage providers.
- See the Supported S3 Providers article in the Appendix for a complete S3 provider list.
Azure & GCS Support:
- Support for Native Microsoft Azure Storage and Native Google Cloud Storage services are still under development in Object Mount for Mac.
- For Google Cloud access: Using GCS S3 is recommended instead of using GCS S3 Gateways.
- Native Azure and Native GCS (S3 Gateways) should be considered “experimental” at this time.
Step 1: Download the latest Installation Image
Download the correct macOS .dmg disk image file for your system.
Note: Storj customers have 2 free licenses included. To obtain additional licenses or if you are not a Storj customer, reach out to your 🌐 Storj Representative.
Mac Chip Types
Be sure to choose the disk image that matches your chip architecture:
- x86 for Intel processors
- arm64 for Apple Silicon/chips (M1-M5).
To determine which chip you have:
- Click the Apple menu in the top left
- Select About This Mac
- Look for Processor (Intel) or Chip (Apple M1, M2, etc.)
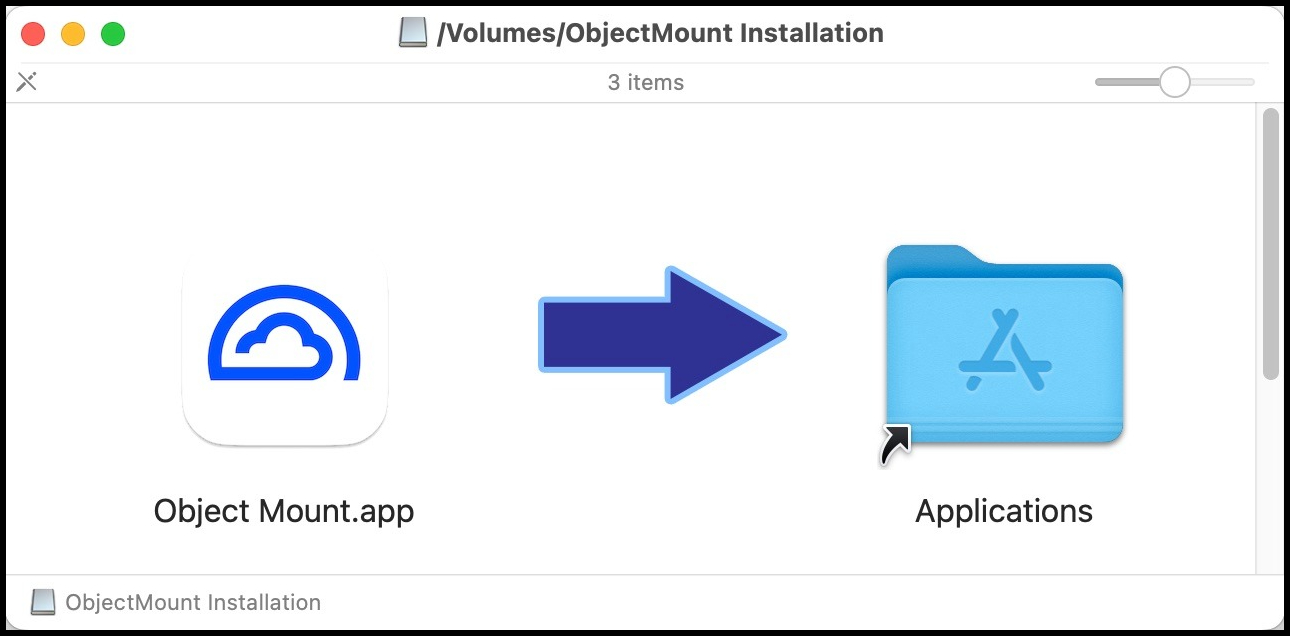
Step 2: Install the Object Mount App
Double-click the
.dmgfile to mount itDrag the Object Mount app into your Applications folder
Step 3: Install macFUSE (Required)
The native macOS Object Mount app requires the macFUSE system extension.
macFuse, on both Intel and Apple silicon Macs, provides system-level volume mounting extensions that Object Mount leverages.
Download and install macFUSE following the steps below for your Mac hardware type:
Download the latest version (not pre-release)
.dmgimage from the macFUSE releases page.Open the macFUSE
.dmgand run the Install macFUSE.pkg.- As prompted, click Allow, Continue and/or Agree to install the package
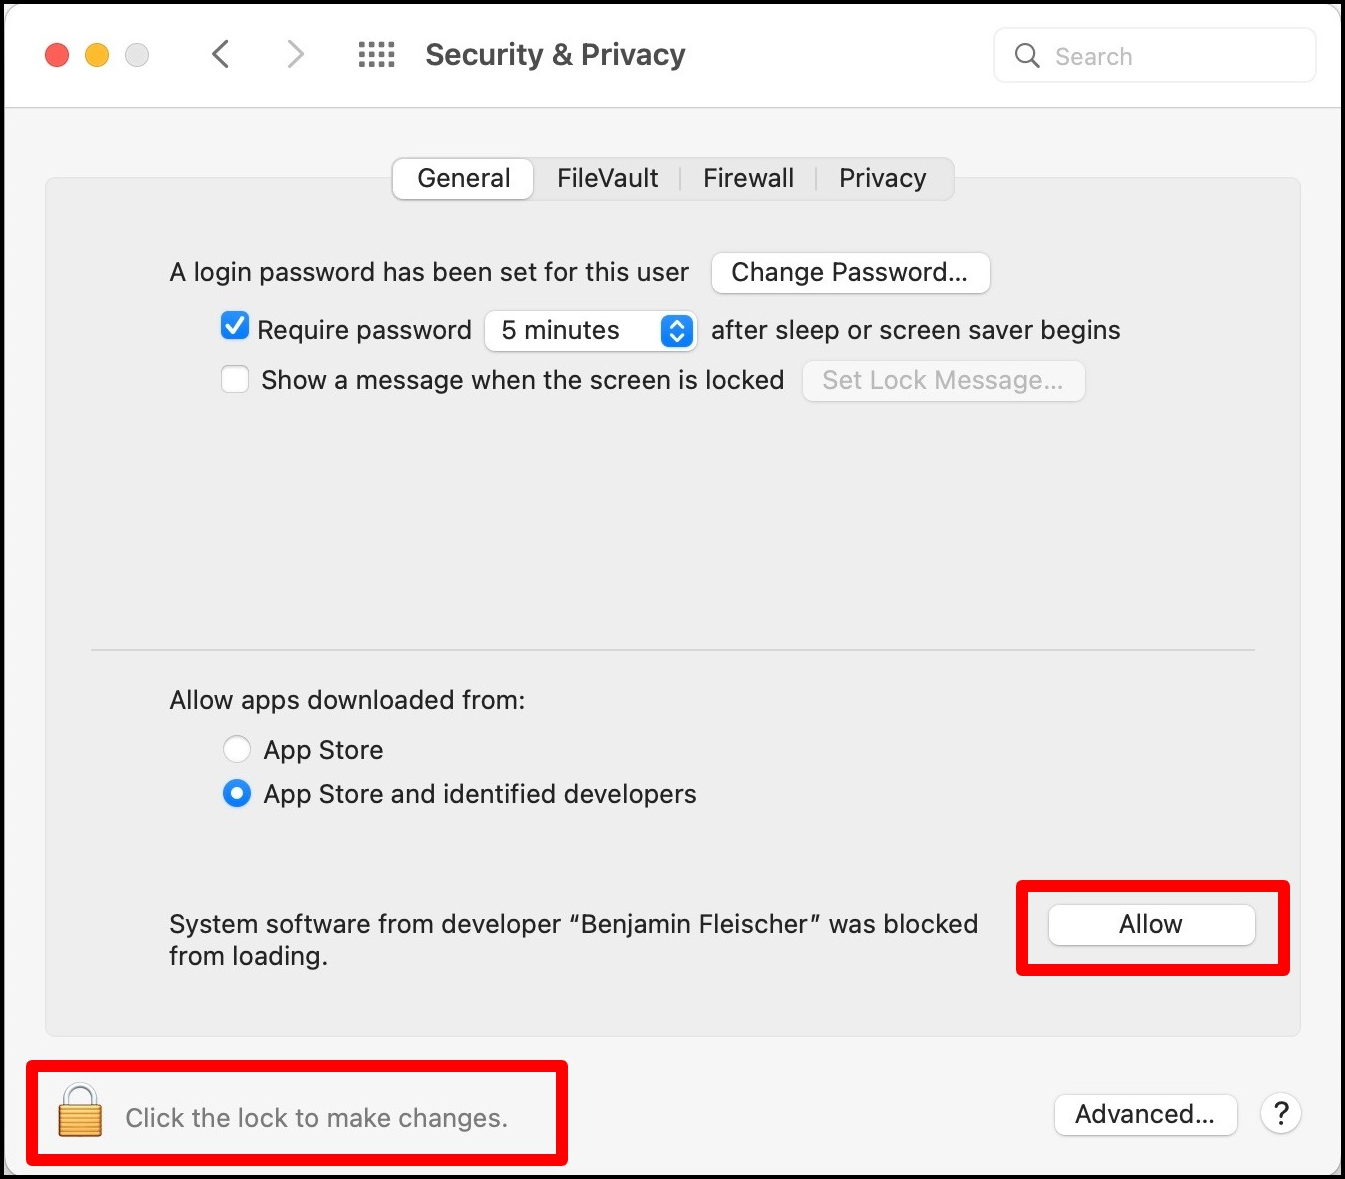
As a new System Extension, the package will generate a “System Extension Blocked” message.
- Open System Settings
- Open Security & Privacy
- Click the lock 🔒 icon to allow changes
- Click the Allow button to permit the installation
Restart your Mac when prompted.
Next Steps
Proceed to the macOS User Guide to activate your Object Mount installation, configure your object storage credentials, and create your first mount.
Then review the macOS Feature Guide.
Finally, read through the usage tips for your specific Media Workflows and Applications.