Getting started with Storj Testnet on FreeNAS (freeBSD)
If you want to try it on Linux, you can read the article https://github.com/storj/storj/wiki/Test-network
In addition, you can try it on Windows: Getting started with Storj Testnet on Windows.
Author: Our fellow Community member @Odmin
FreeNAS® is an embedded open-source network-attached storage (NAS) operating system based on FreeBSD and released under a 2-clause BSD license. A NAS has an operating system optimized for file storage and sharing.
FreeNAS® provides a browser-based, graphical configuration interface. The built-in networking protocols provide storage access to multiple operating systems. A plugin system is provided for extending the built-in features by installing additional software.
FreeNAS has independent hardware recommendations for newly built system, so before you begin, please make sure that you meet at least the minimum hardware requirements.
Once your hardware is ready you can move forward with installation.
Install Storj inside a FreeNAS Jail
We will create a ZFS dataset and create a new FreeNAS Jail to run a local Storj test network (Storj-Sim), following the steps outlined below.
Create a new ZFS dataset for store Storj data:
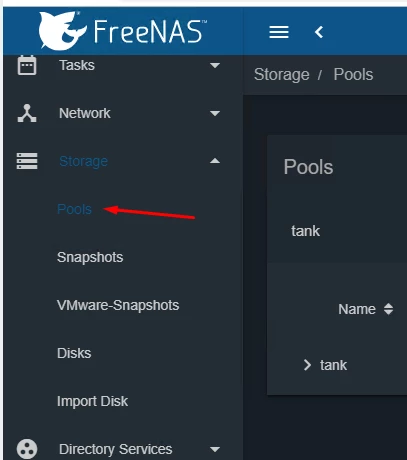


Figure 1. Creating a new dataset for storage
Specify options for a new dataset - see Figure 2.

Figure 2. Options of the new dataset
Please make sure you have the following settings configured:
- Name -
Stojv3_data - Compression -
lz4 - Share Type -
Unix - Enable atime -
OFF - ZFS Deduplication -
OFF
Then click on Advanced Mode.
Depend on your HDD pool configuration, you can see the default value for Record Size (in our case 32K) - see Figure 3.

Figure 3. Record Size for the Pool
Create a new FreeNAS Jail
To activate Pool for Jail Manager, just click CONFIG. See Figure 4.


Figure 4. Creation of a new Jail
Then click ADD. Fill in a new Jail name and select the latest FreeBSD release (Figure 5)

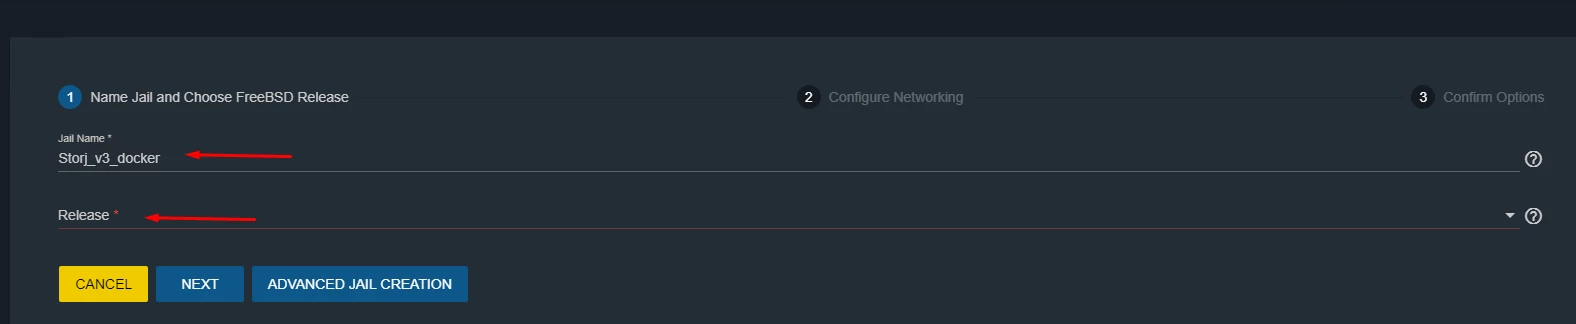
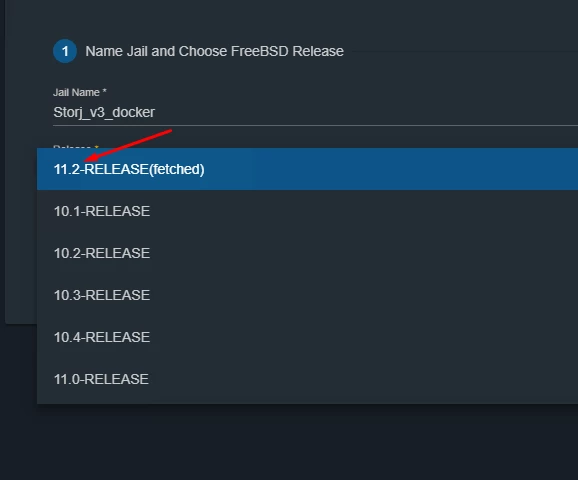
Figure 5. Adding a new Jail with parameters
Select both options - DHCP Autoconfiguration IPv4 and VNET (Figure 6)
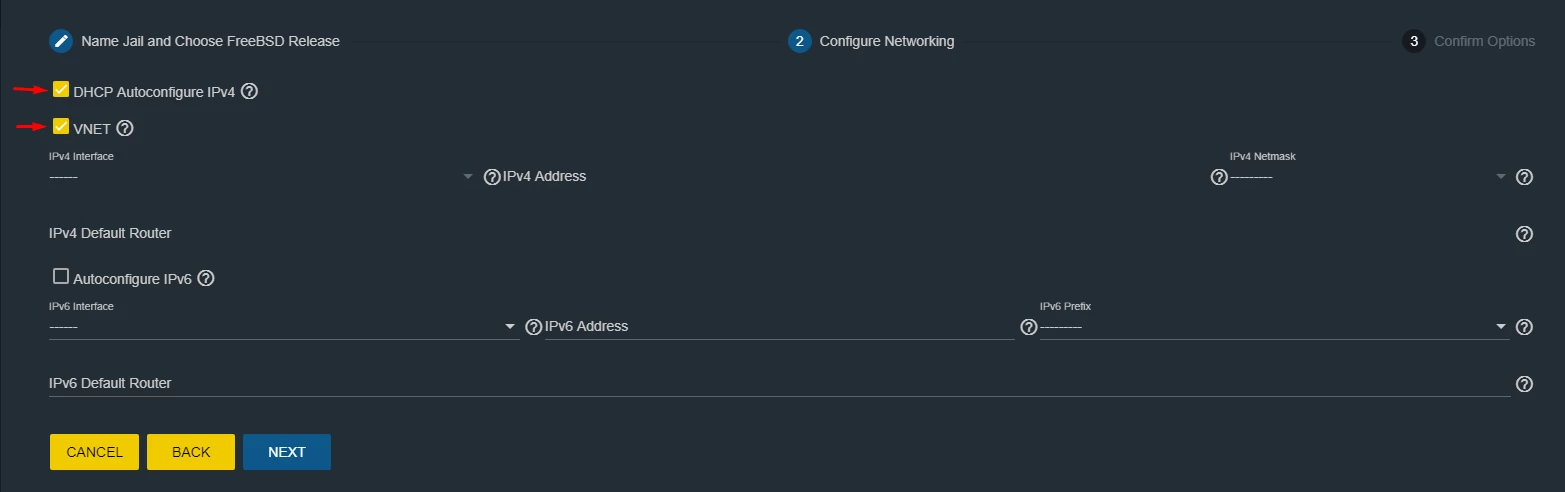
Figure 6. DHCP Autoconfiguration IPv4 and VNET
Check configuration and click SUBMIT (Figure 7)

Figure 7. Submit configuration of a new Jail
Wait until the new Jail has been created, then click the three dots on the right side and specify the mount point inside a Jail to store data (Figure 8)

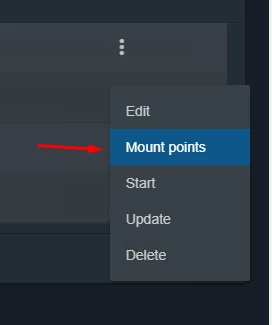

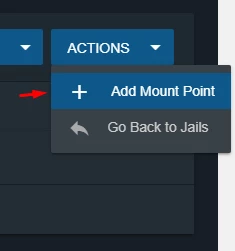
Figure 8. Mount point
Select our dataset (we created it earlier with name Storjv3_data) as a source and mount point inside a Jail (which will be storj_data) as a destination - see Figure 9.
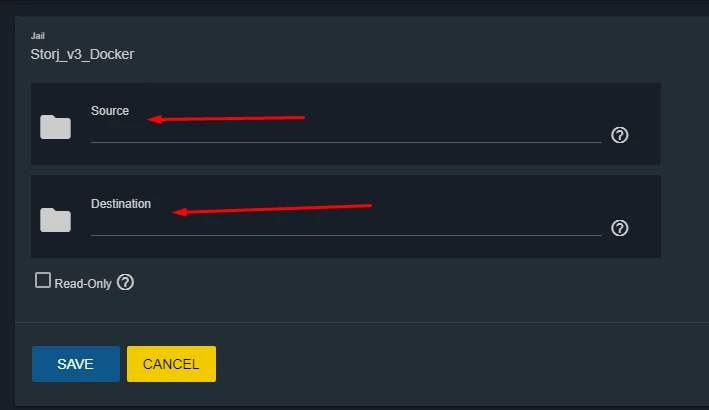
Figure 9. Options of mountpoint
Here is an example - see Figure 10.
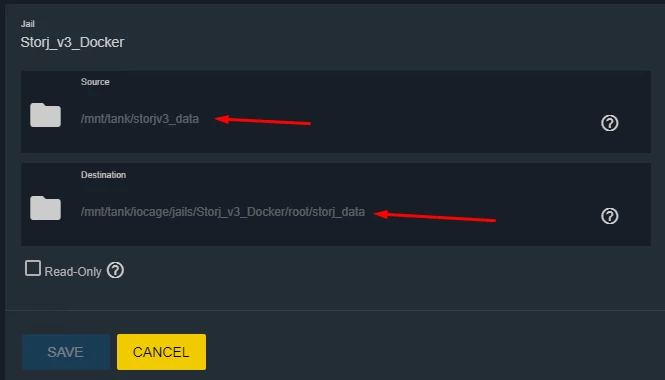
Figure 10. Example of options for the mountpoint
Now you can start a Jail - see Figure 11.


Figure 11. Starting a Jail
Configure the FreeNAS Jail
Select the three dots on the right side and select Shell to access the Jail console - see Figure 12.
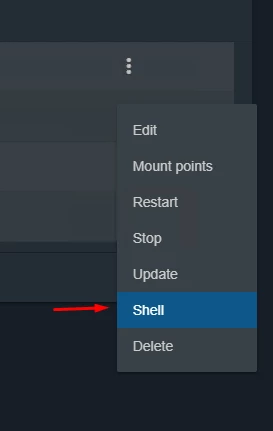
Figure 12. Starting a Jail shell
Let’s enable SSH access and allow connections to the Jail for your favorite SSH client. See example on Figure 13.

Figure 13. Example of the command execution
Install useful packages
Set PermitRootLogin to yes in the /etc/ssh/sshd_config:
Uncomment PermitRootLogin and set to yes (see Figure 14), then save the file (Press Ctrl+X for exit and Y for save changes).
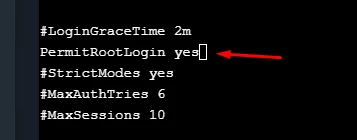
Figure 14. Changing PermitRootLogin option in the text editor
Start the SSH service:
Set a new password for root user:
Now you can log in via SSH using login: root and your password (check the Jail section for the IP address) - see Figure 15.
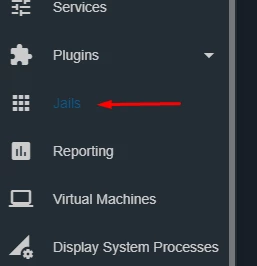

Figure 15. IP address for connections to the Jail
Install the latest Go package
Check Go version (Figure 16)
Figure 16. Check Go version
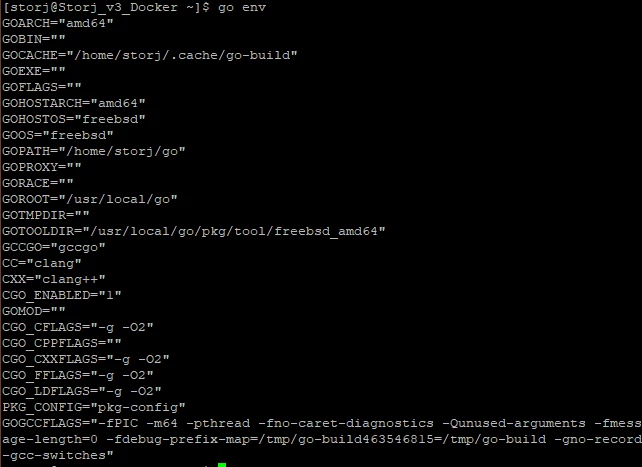
Figure 17. Example of environment variables for Go
Add a new user for Storj with Username storj and set shell: bash - see Figure 18.
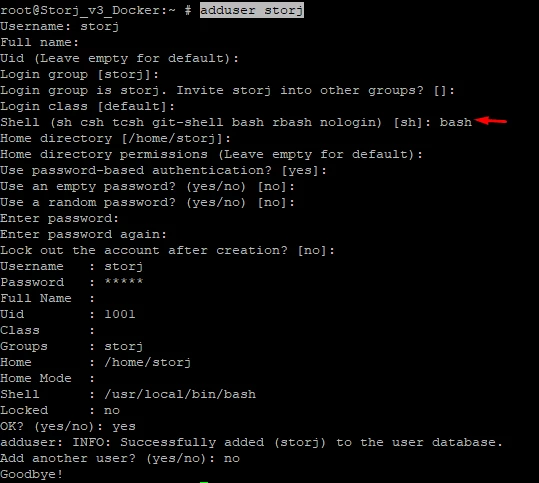
Figure 18. Adding a new storj user
Become a storj user:
Setup Go Environment
Open your .profile file and add a global variables as follows at the end of the file. See Figure 19.
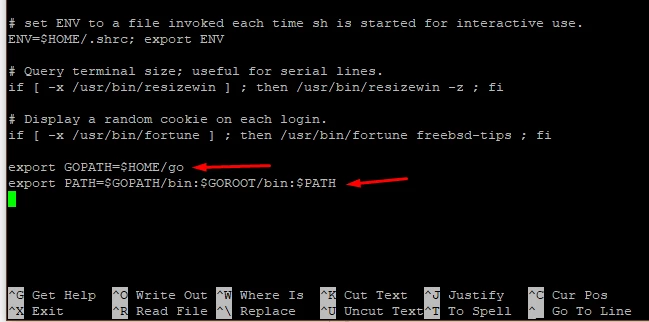
Figure 19. Adding a global variables to the .profile
Press Ctrl+X for exit and Y for save changes
Update the current shell session
Compile Storj from Source
Connect to the Jail shell and execute:
check the binary folder
Let´s create a local test network, containing the Satellite, Uplink, S3 gateway and 10 storage nodes and run it.
Now the test network is ready and you can see the output like this - see Figure 20.

Figure 20. Example of the output of a local test network
More information - Test network