Using Storj DCS with GitHub Actions
Written by Kaloyan Raev
GitHub Actions is their system to automate, customize, and execute software development workflows in the GitHub repository. This article will inform you how to upload files to a Storj DCS bucket from a GitHub Actions workflow.
The Storj DCS Public Network Stats is one of the projects at Storj where we use GitHub Actions. The statistics are hosted as a static website on Storj DCS, so we have an easy way to redeploy the homepage when we merge any modification in the code repository. We created a GitHub Actions workflow that converts the Markdown file of the homepage to an HTML file and then uploads it to the bucket hosting the website.
GitHub Actions has a marketplace for actions created by the community. Instead of creating our own Storj-specific action to upload files to Storj DCS, we decided to keep it simple and use the s3-sync-action that the community has already created. The s3-sync-action allows uploading files to an S3-compatible storage service, so we took advantage of Storj Gateway-MT - the globally available, multi-region hosted S3-compatible gateway.
Let’s break down the specific GitHub Actions workflow for the Storj DCS Public Network Stats project. The complete workflow is here.
Every workflow starts with declaring its name:
Then follow the rules for triggering the workflow:
In this case, the workflow triggers when a commit is merged to the main branch, and that commit modifies the homepage.md file.
Next, we have the definition of the job that will be run when the above event triggers:
The job will run on an Ubuntu VM and will execute the following three steps:
- Check out the head of the GitHub repository
- Convert the homepage.md file to index.html
- Upload the index.html file to the Storj DCS bucket.
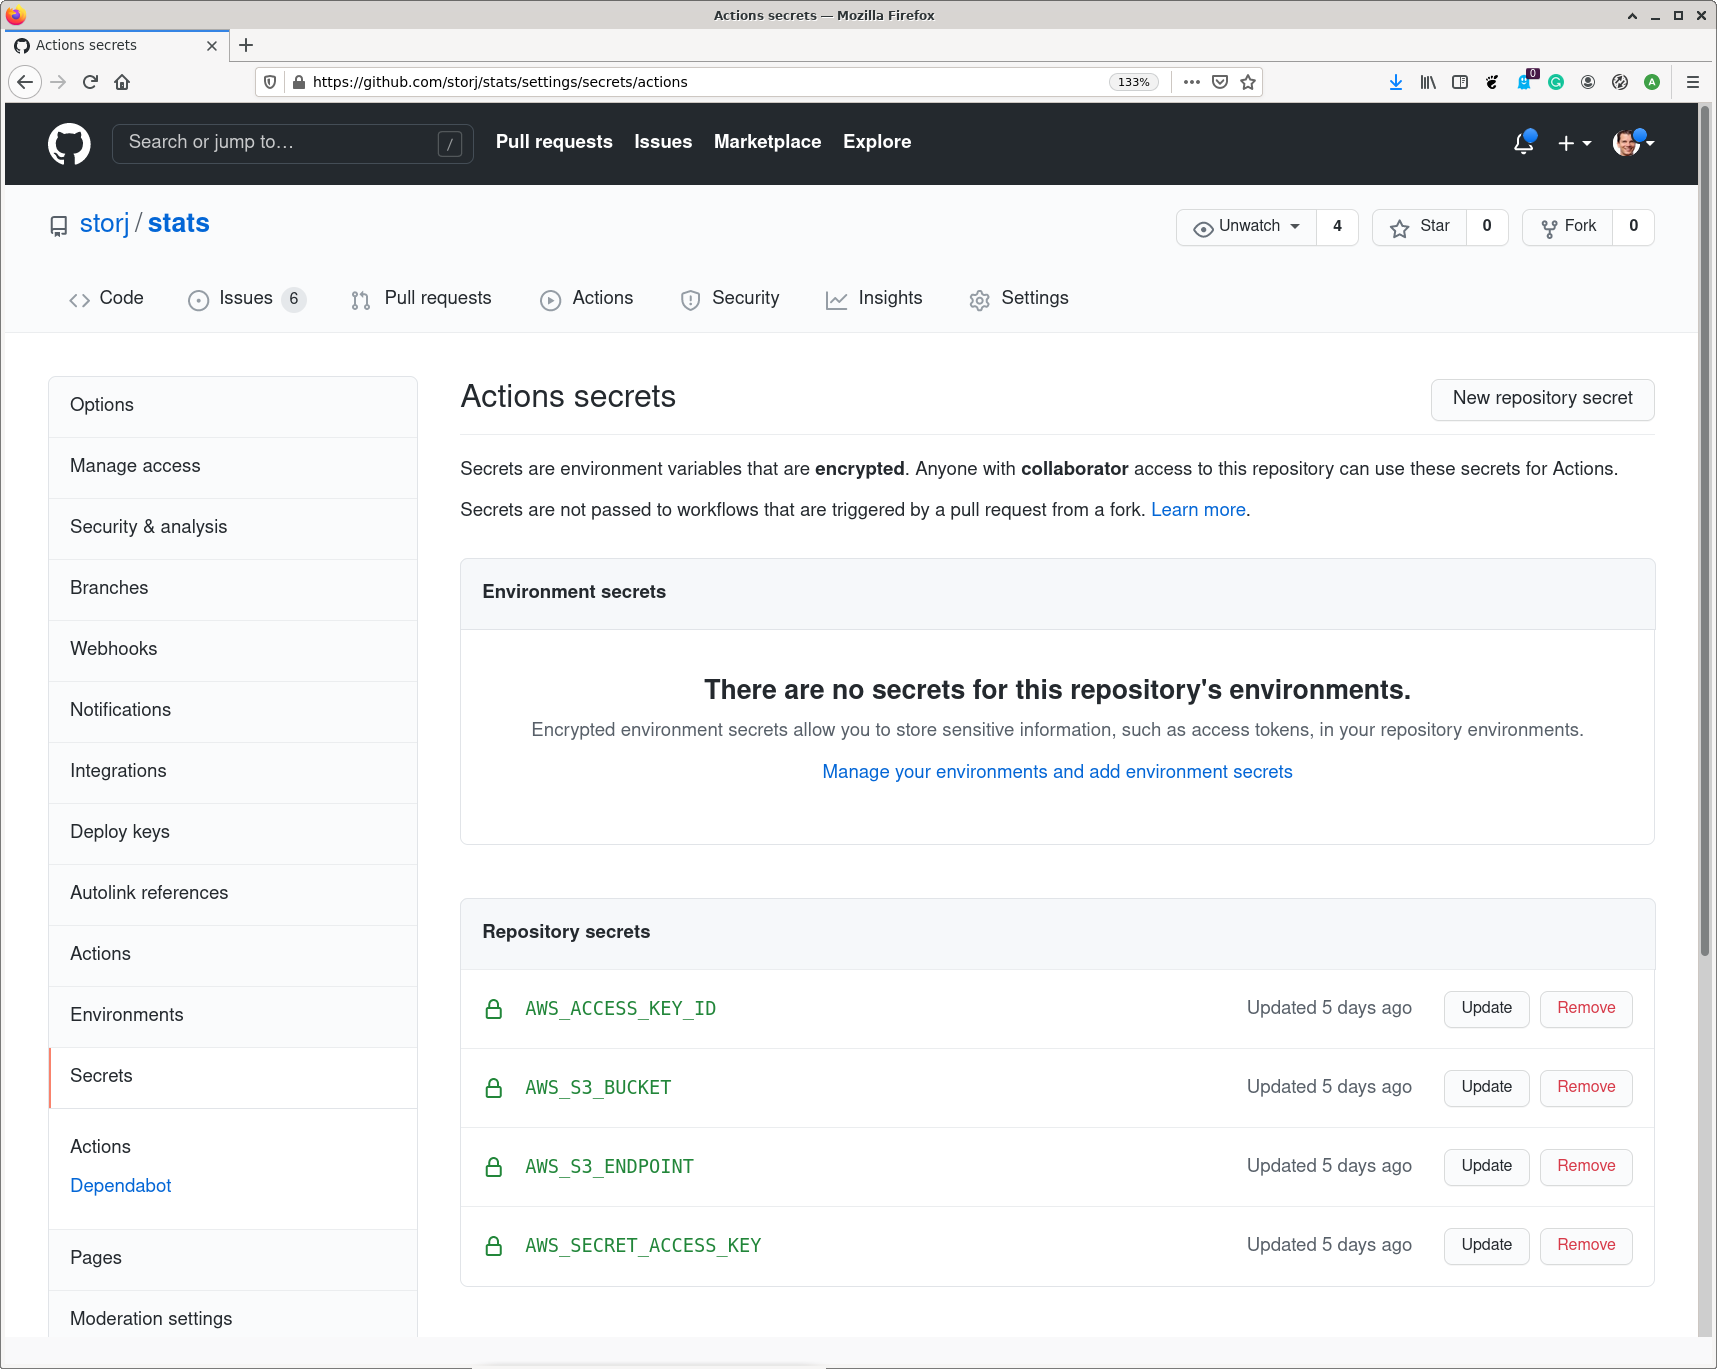
The destination bucket and the S3 credentials for s3-sync-action are configured through environment variables. In this case, we use encrypted secrets from the GitHub repository to keep this information private and safe from public eyes.
Encrypted secrets can be configured in the “Secrets” section of the repository settings.

All these secrets can be created via the Storj Satellite web interface. After logging in to the web interface, we make sure that the target bucket is already created. If not, the easiest way to create it is using the Object Browser. Then we set the name of the bucket as the AWS_S3_BUCKET secret in the Github repository.
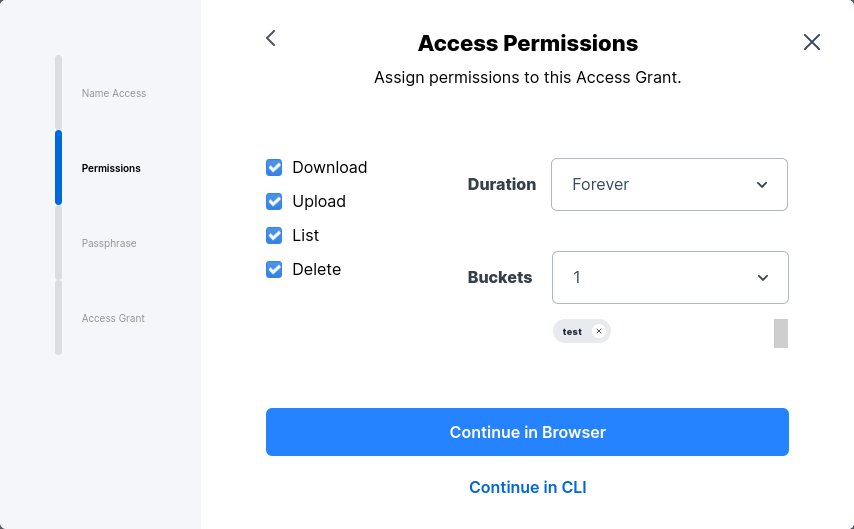
Having the bucket created, next, we create S3 credentials that grant access to that bucket. This is done by creating a new access grant from the web interface.
In the Permissions dialog, we make sure to limit the access only to the target bucket instead of giving access to the whole project.

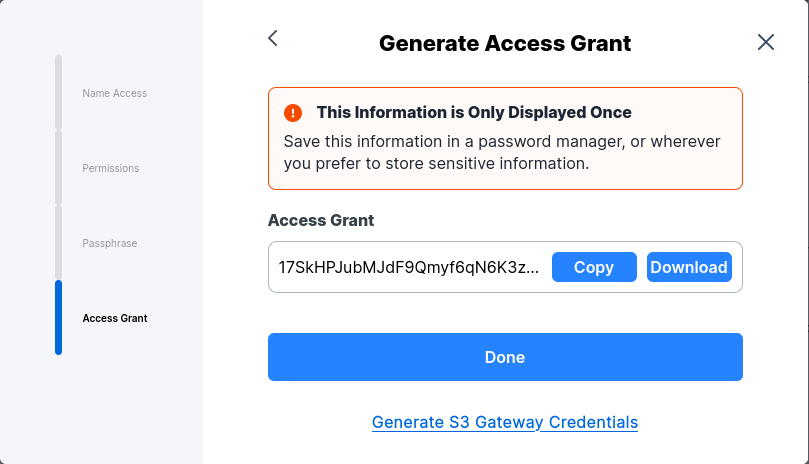
In the Access Grant dialog, we click on the Generate S3 Gateway Credentials button.

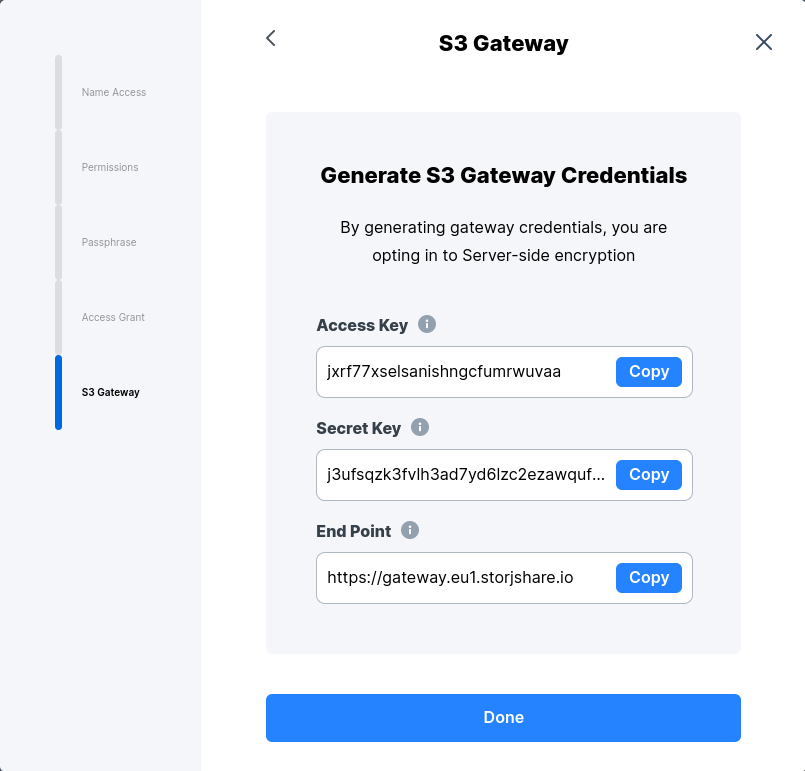
This generates the S3 credentials for the access grant that can be used with Gateway-MT.

We use these credentials to set the remaining secrets in the Github repository:
- AWS_ACCESS_KEY_ID is set to the Access Key value
- AWS_SECRET_ACCESS_KEY is set to the Secret Key value
- AWS_S3_ENDPOINT is set to the End Point value
With this, everything is now complete to run the GitHub Actions workflow successfully.
If you have any questions, please feel free to reach out to us at support@storj.io or visit https://supportdcs.storj.io/hc/en-us.
Like this post? Share it
